Letter of authorisation requests
5
min read
Guide benefits
This guide demonstrates how to use Proto’s platform to automate Letter of Authorization (LOA) requests. LOA processing is traditionally managed via hotlines or on-site requests, creating delays for insured members seeking access to healthcare services. Deploying an AI agent digitises the entire process—members provide basic verification, select the service and provider, and receive an LOA instantly.
Who can benefit from this guide:
- Insurance providers offering healthcare coverage
- Health Maintenance Organisations (HMOs)
- IT teams responsible for digital health channels
- Operations or CX managers digitising patient support
Letter of Authority (LOA) requests
A Letter of Authorization (LOA) allows insured members to access healthcare services—such as consultations or diagnostics—at accredited facilities without upfront payment. The LOA serves as official confirmation that the service will be covered under the member’s plan. With an AI-powered workflow, members can receive an LOA instantly, valid for a limited time and redeemable at clinics. This automation reduces administrative overhead and accelerates access to care. See how to automate LOA generation.
Letter of authorisation
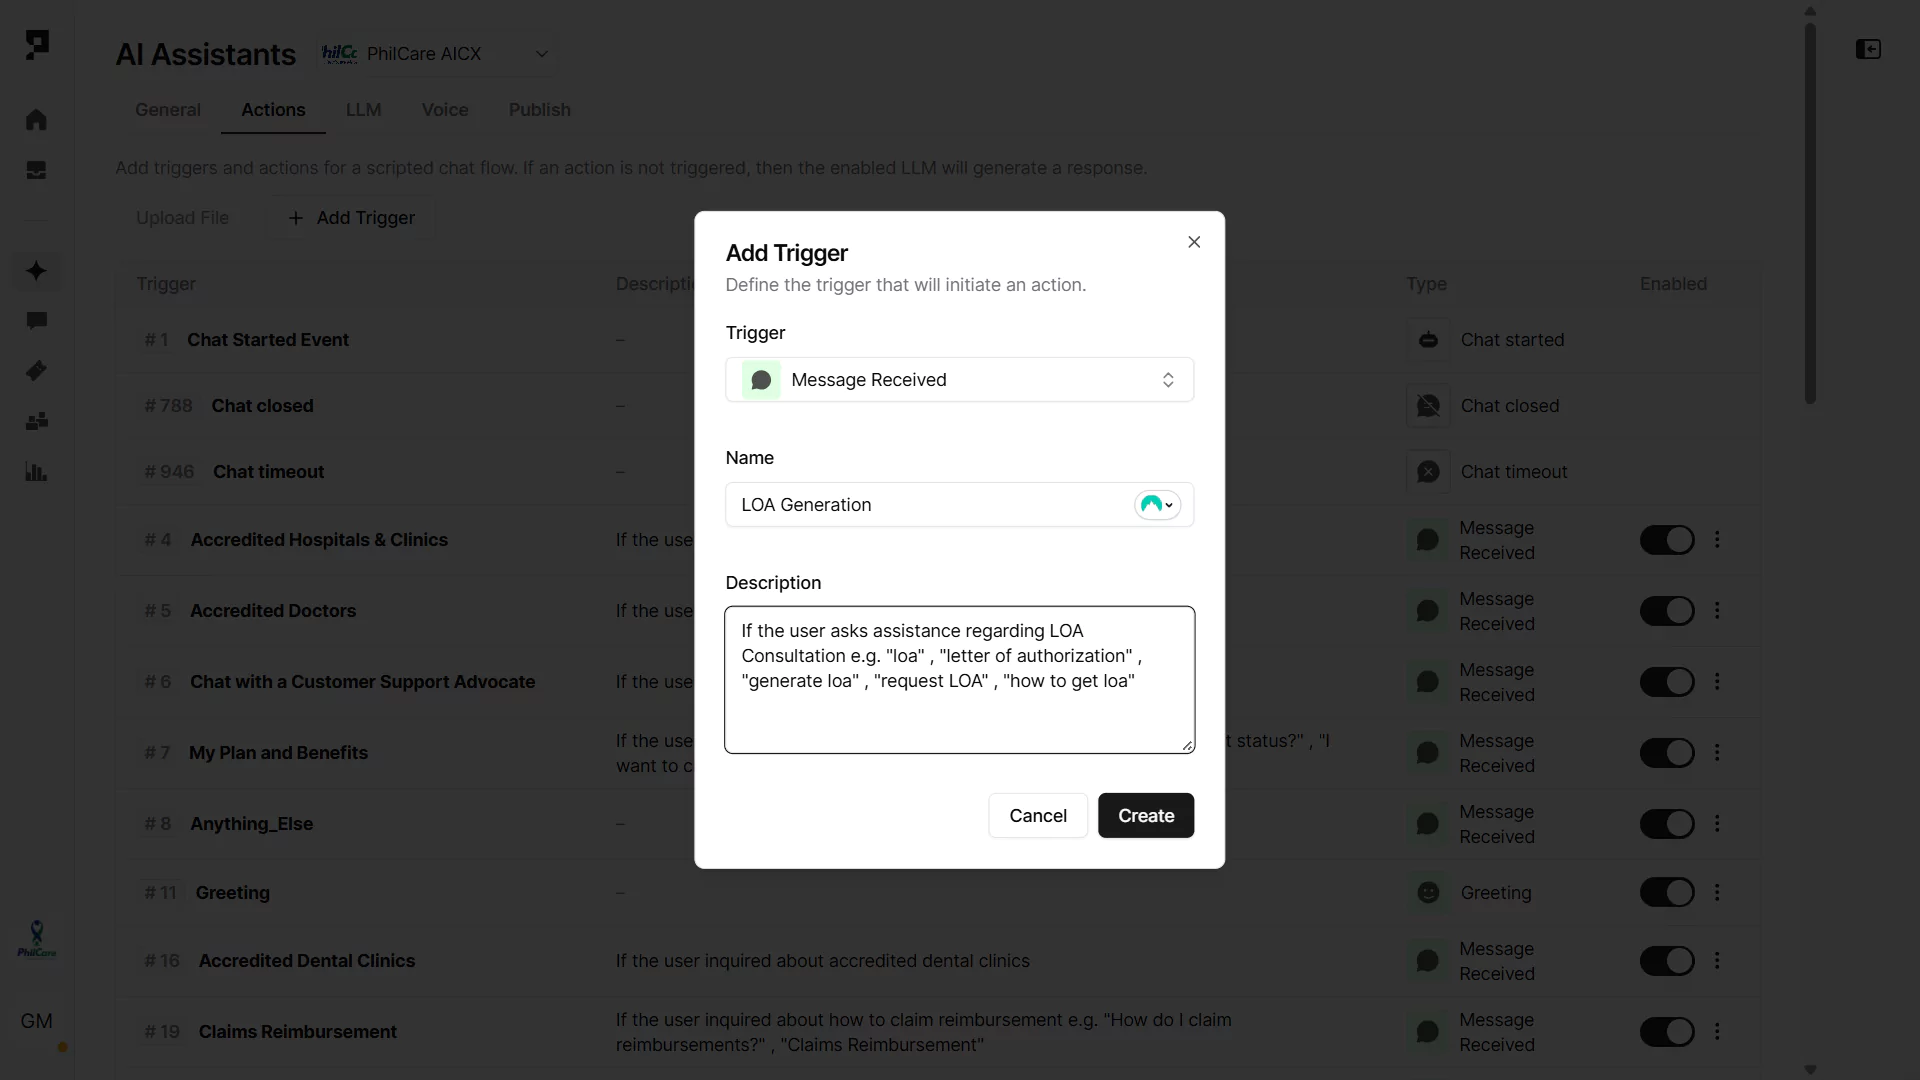
1. Create a Trigger
Purpose: Create a new flow within AI agent actions.
- Navigate to the Actions tab in the AI agent’s settings.
- Click “+ Add Trigger” button and select the Message Received trigger type.
- Name the trigger (e.g. “LOA Request”) and provide a short description like “Triggers if user requests a Letter of Authority for consultation.”
- If your AI agent is powered by an LLM, the Description acts like a prompt to help the AI decide when to activate the trigger.
Learn more about AI Triggers and Actions.
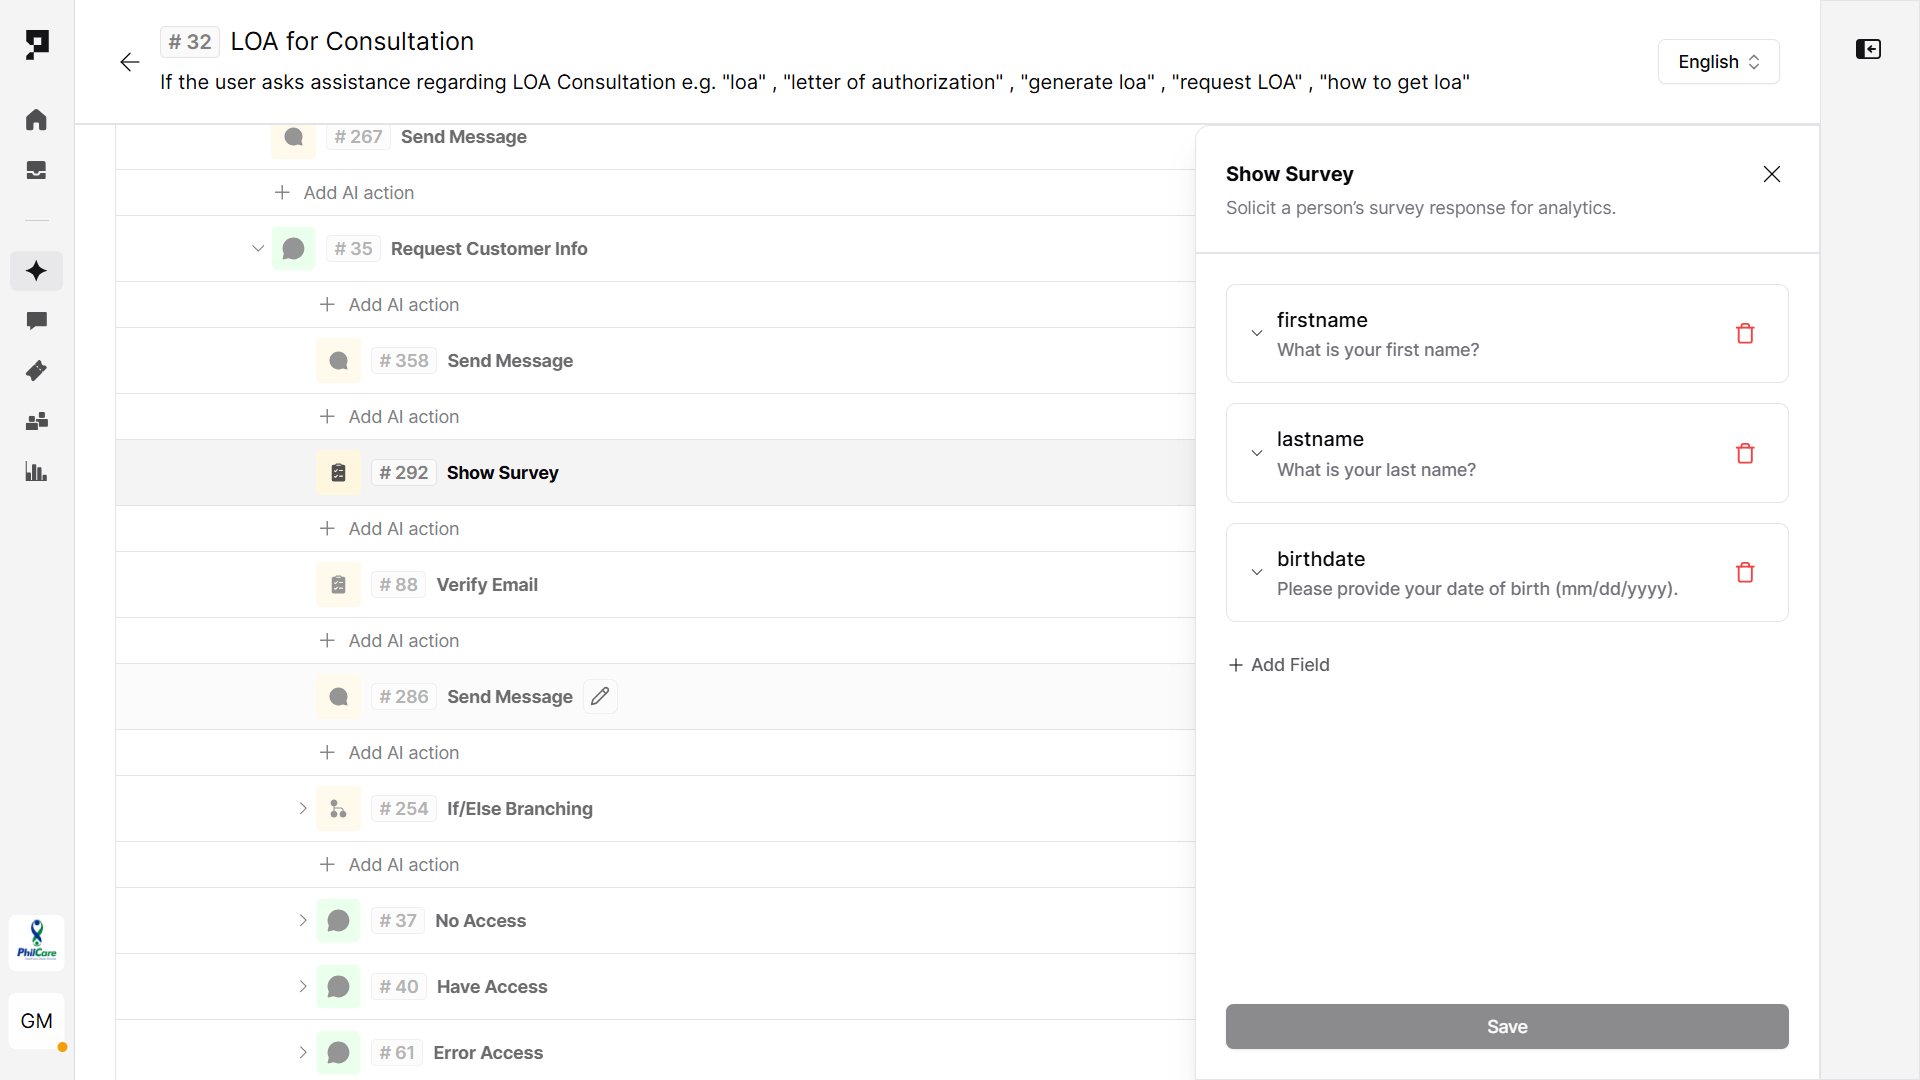
2. Collect user verification details via Survey
Purpose: Capture user details needed to process the LOA.
Use a Survey Action to collect the user information. Every value will be automatically stored in the related variable:
- First name (
first_name) - Last name (
last_name) - Birthdate (
birthdate)
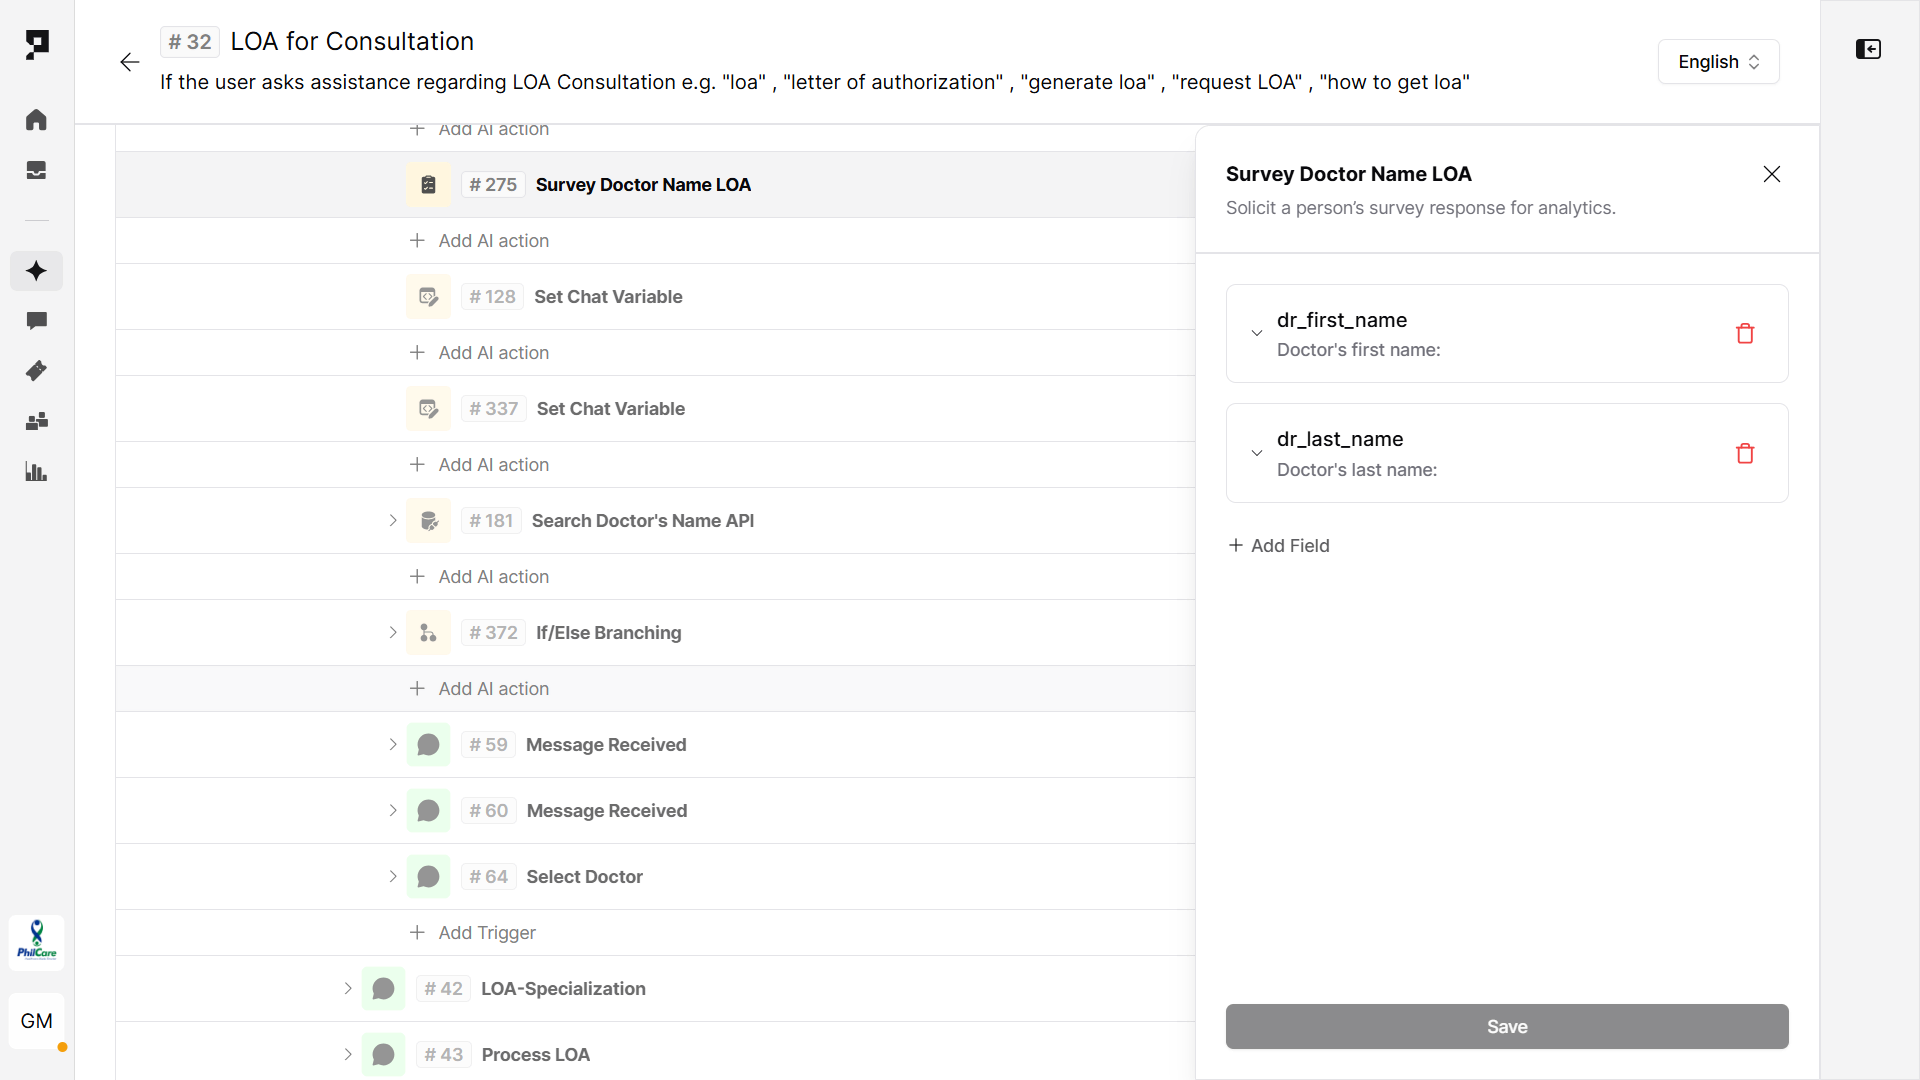
3. Collect doctor details via Survey
Purpose: Capture the consulting doctor’s name.
Use another Survey Action to collect the doctor details:
- Doctor’s first name
dr_first_name - Doctor’s last name
dr_last_name
4. Validate eligibility with API
Purpose: Validate doctor details and check LOA eligibility.
- Use the Send API Request action. Method:
GET - Add URL endpoint, API key and define the variable to store the API response (e.g.
loa_result.response).
5. Confirm LOA approval
Purpose: Notify the user if the LOA was approved based on the API response.
Use a If/Else branching Action to evaluate the API response variable:
- Condition:
loa_result.response.successFlag == true– Inform the user that the selected doctor’s services are included in their coverage. - Else: Suggest the user select another doctor.

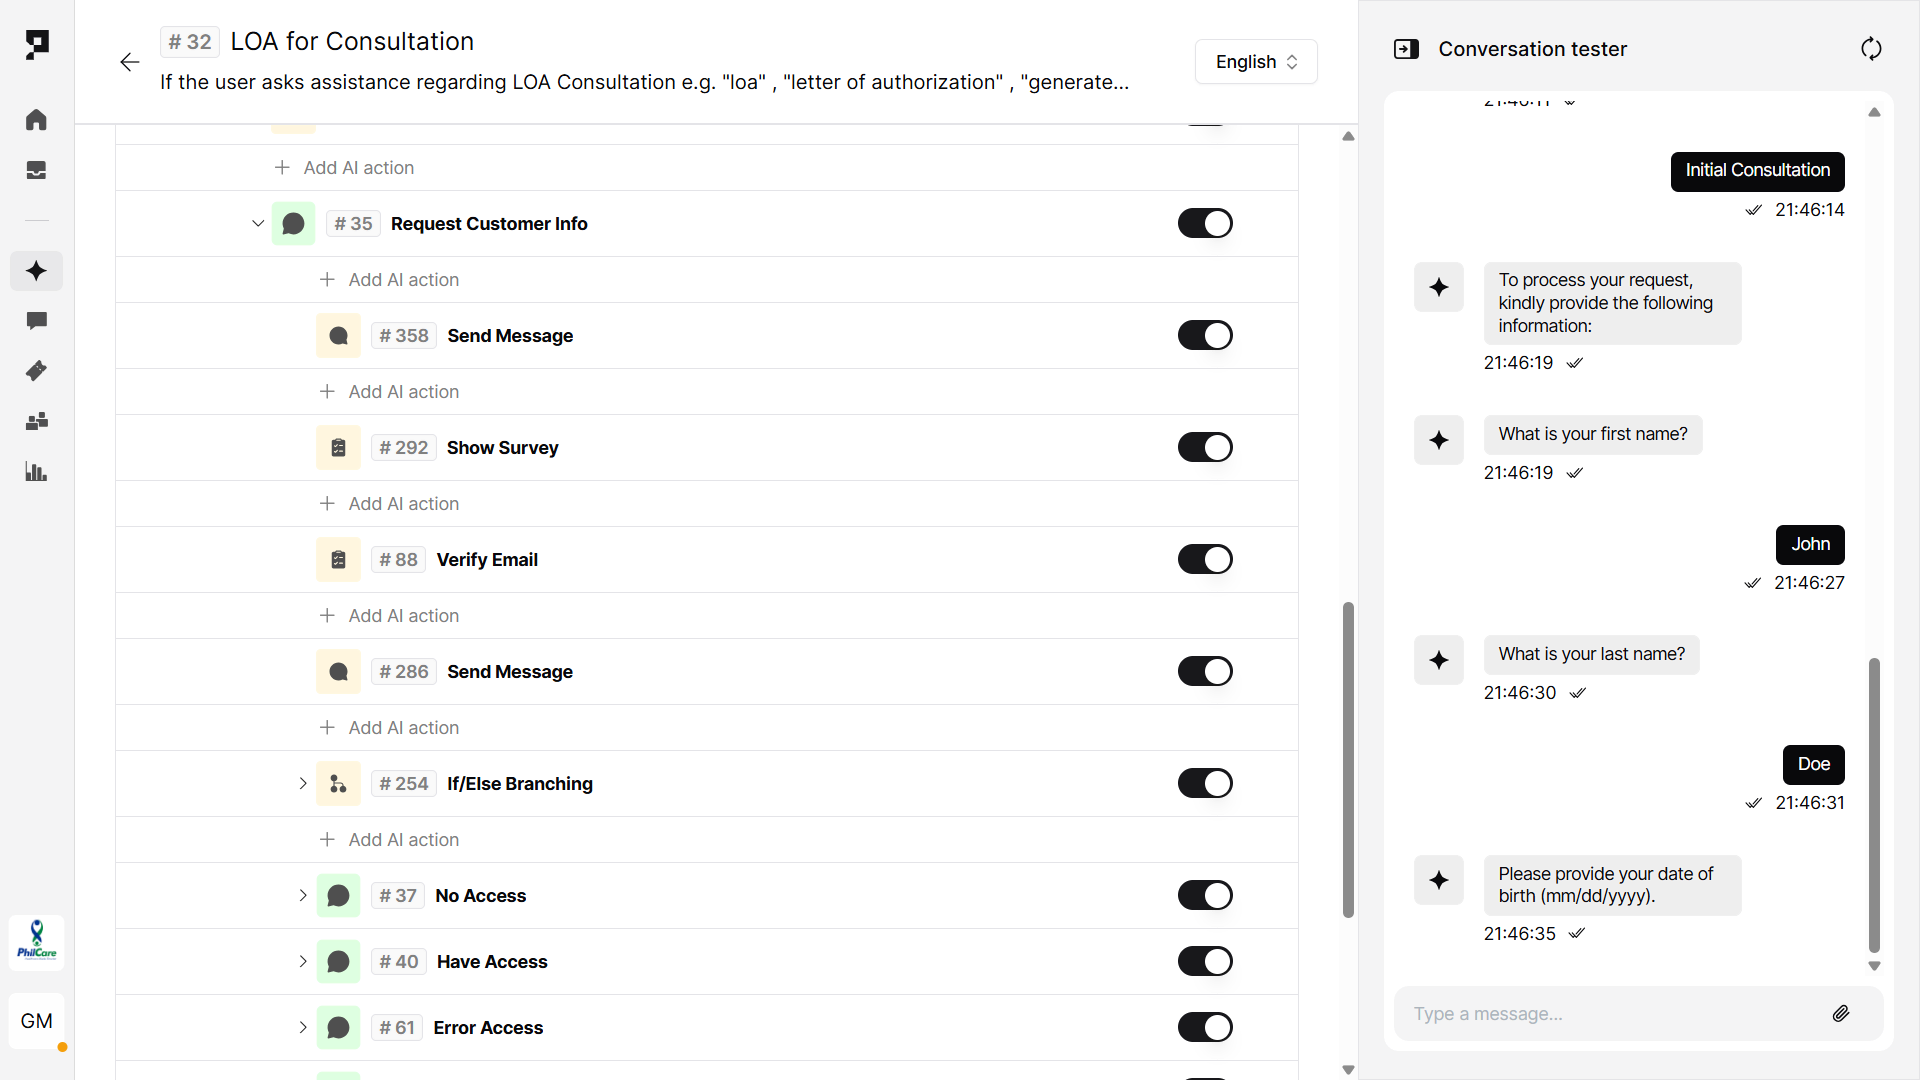
6. Test the Flow
You can test your new workflow without leaving the Action settings, using the Conversation tester side panel. Finalize the AI agent deployment by configuring your preferred channels and languages.
Client stories
In the Philippines, PhilCare uses Proto’s platform to automate high-volume LOA-related interactions and scheduling, managing over 2.6 million interactions annually and automating nearly half of all inquiries related to scheduling, diagnostics, and LOAs—significantly reducing agent workload. Read more.