Complaints intake workflow guide
Workflow purpose
This guide demonstrates how to use Proto's AI agent to capture complaints end-to-end – from the initial message through to a logged support ticket – without any manual intervention.
The workflow collects the complainant's contact details and a description of the issue via a conversational survey, lets them review and correct their submission, then automatically creates a ticket and sends a confirmation. Every step runs within the AI agent's Actions, with no code required.
Who can benefit from this guide:
- Customer support teams handling inbound complaints
- Operations managers looking to reduce manual ticket creation
- Government agencies managing citizen feedback and service complaints
- IT teams deploying conversational AI across support channels
- Any organisation that receives complaints via chat, messaging apps, or web
Complaints intake
This workflow enables people to submit a complaint through a 24/7 conversational AI agent available on web or messaging channels. It reduces intake friction, ensures every complaint is consistently logged, and frees support staff from repetitive data entry. See how to build a complaints intake workflow.
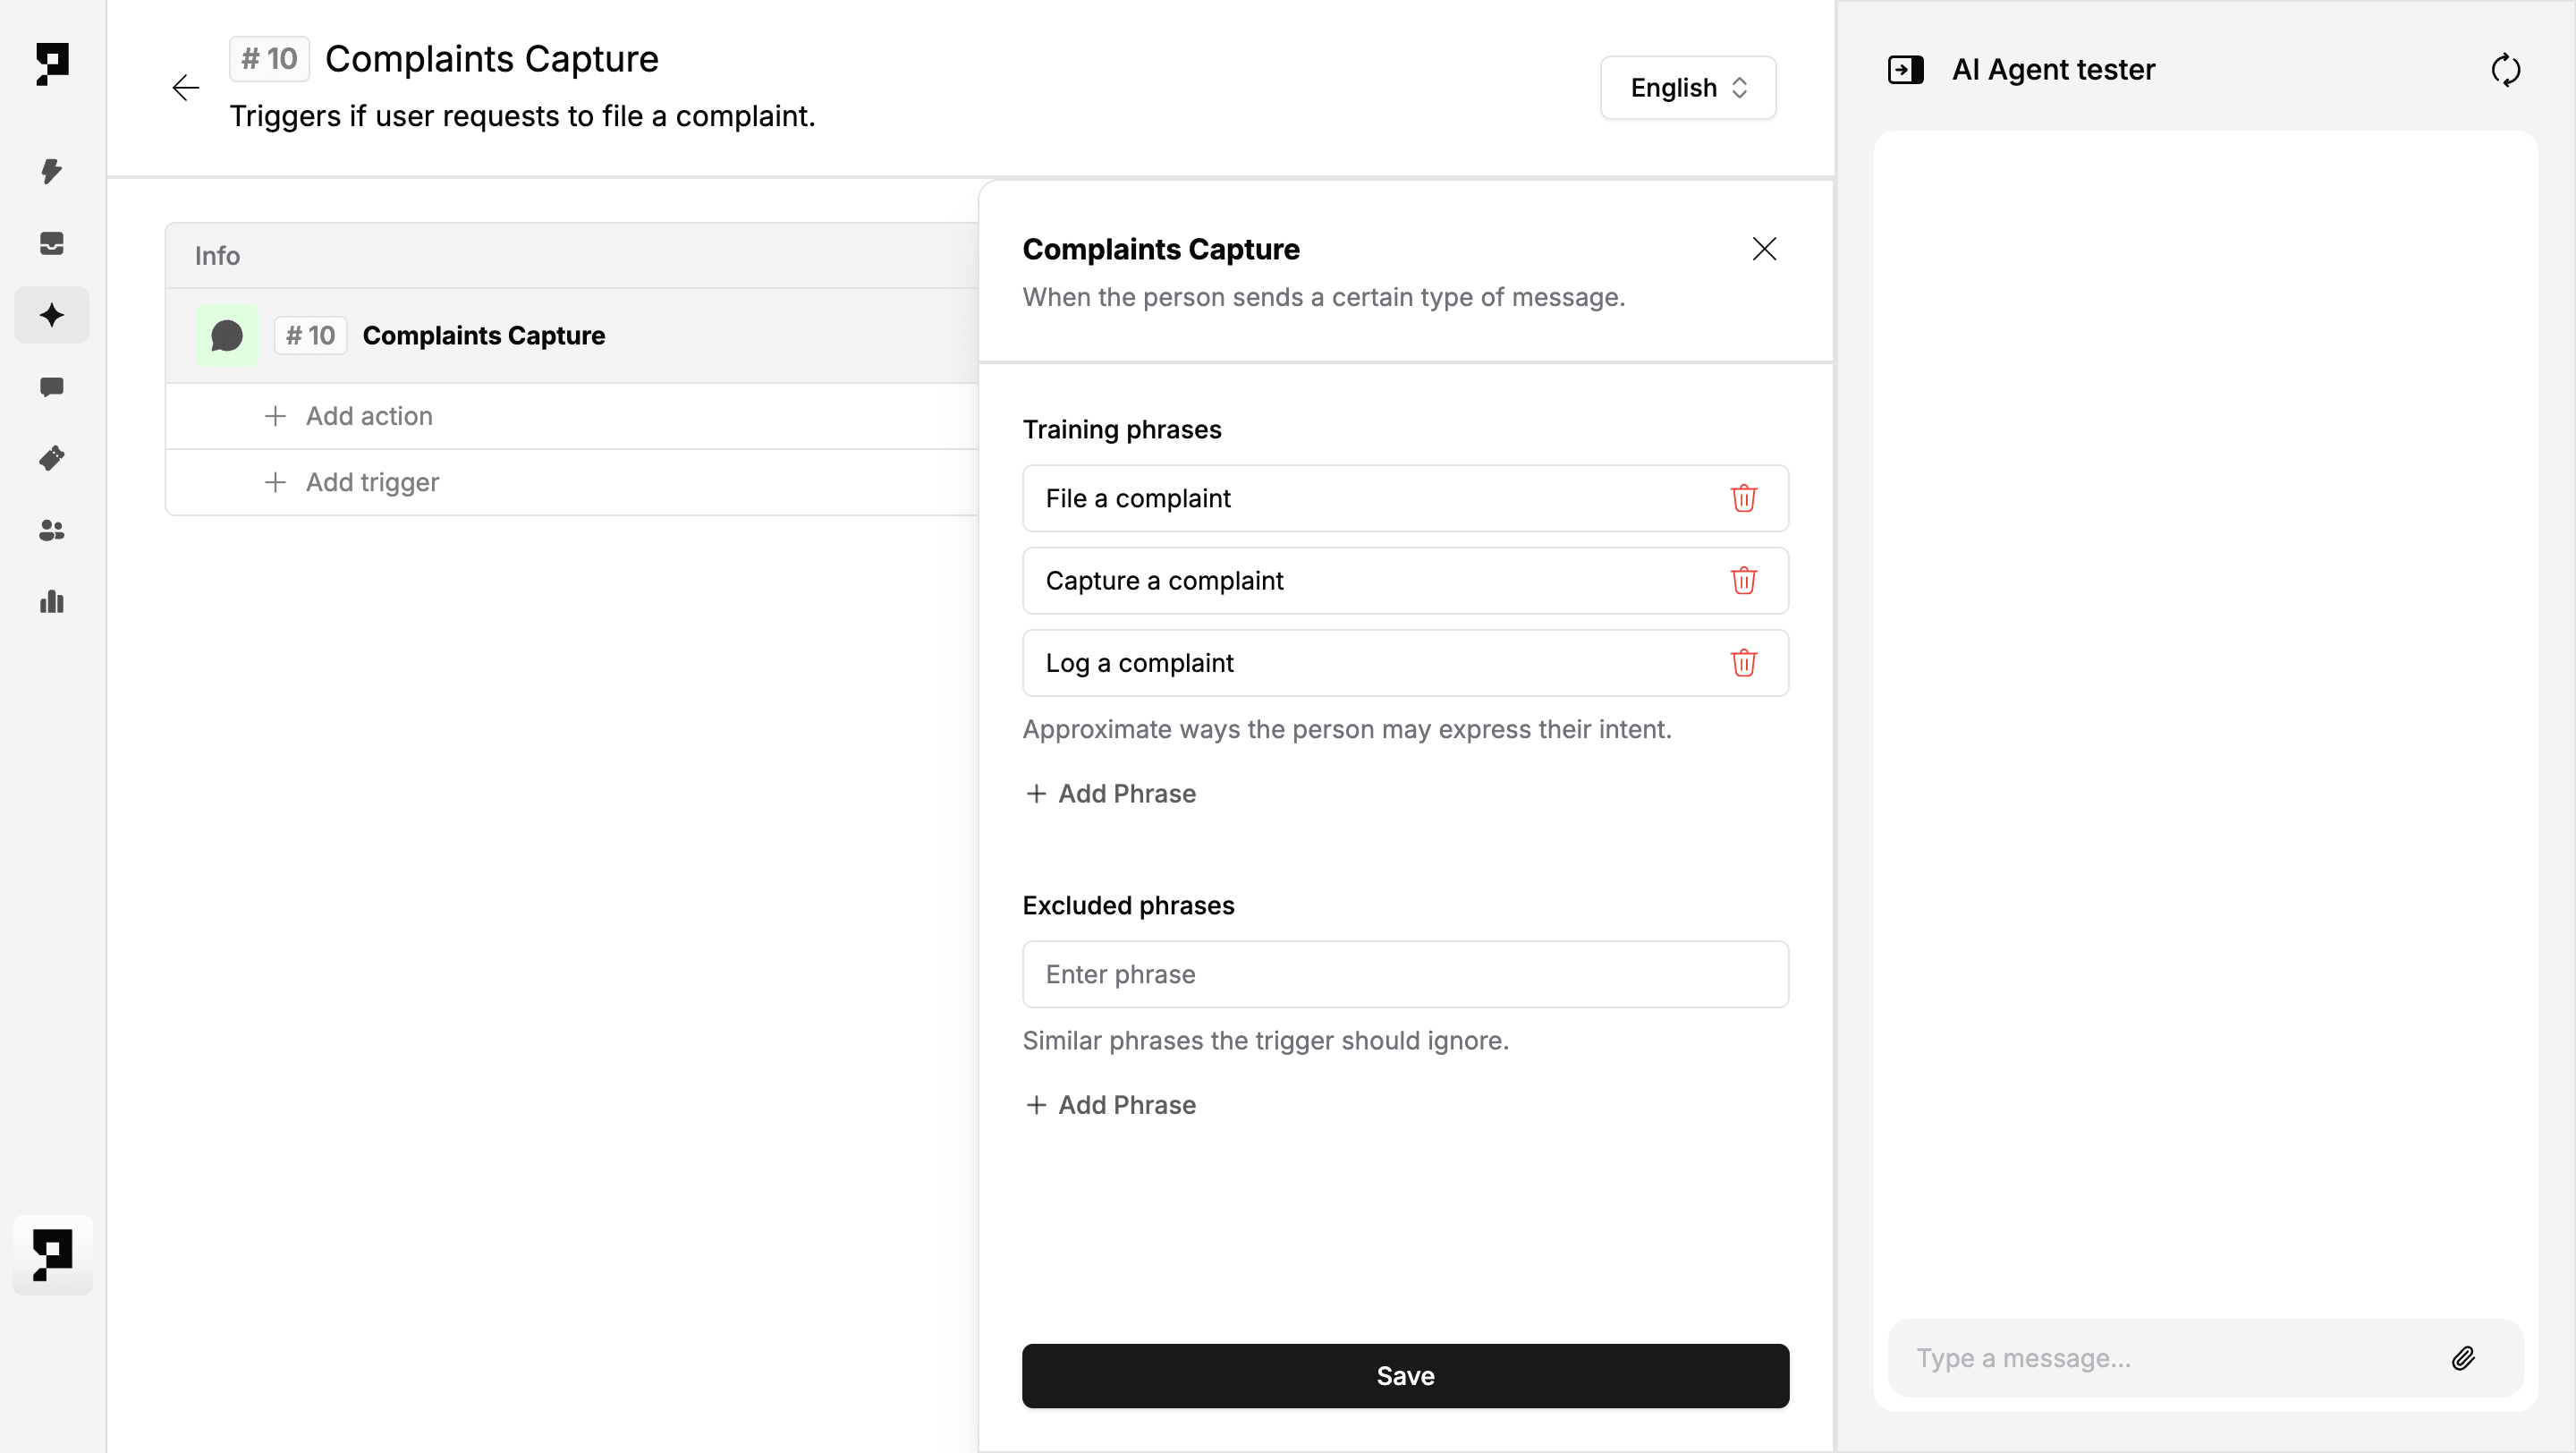
1. Create a trigger
Create a new workflow within AI agent Actions.
- Navigate to the Actions tab in the AI agent settings.
- Click + Add Trigger and select the Message Received trigger type.
- Name the trigger (e.g. "Complaints Capture") and add a short description (e.g. "Triggers if user requests to file a complaint.").

- Once created, add training phrases (e.g. "File a complaint", "Capture a complaint", "Log a complaint"). This and the description added before will help the AI decide when to activate this trigger.
2. Send an opening message
Greet the person and set expectations before collecting any details.
Add a Send Message action with the following prompt:
"Hi! I can help you log your complaint and connect it to the right team. I'll need to collect a few details – it should only take a minute."
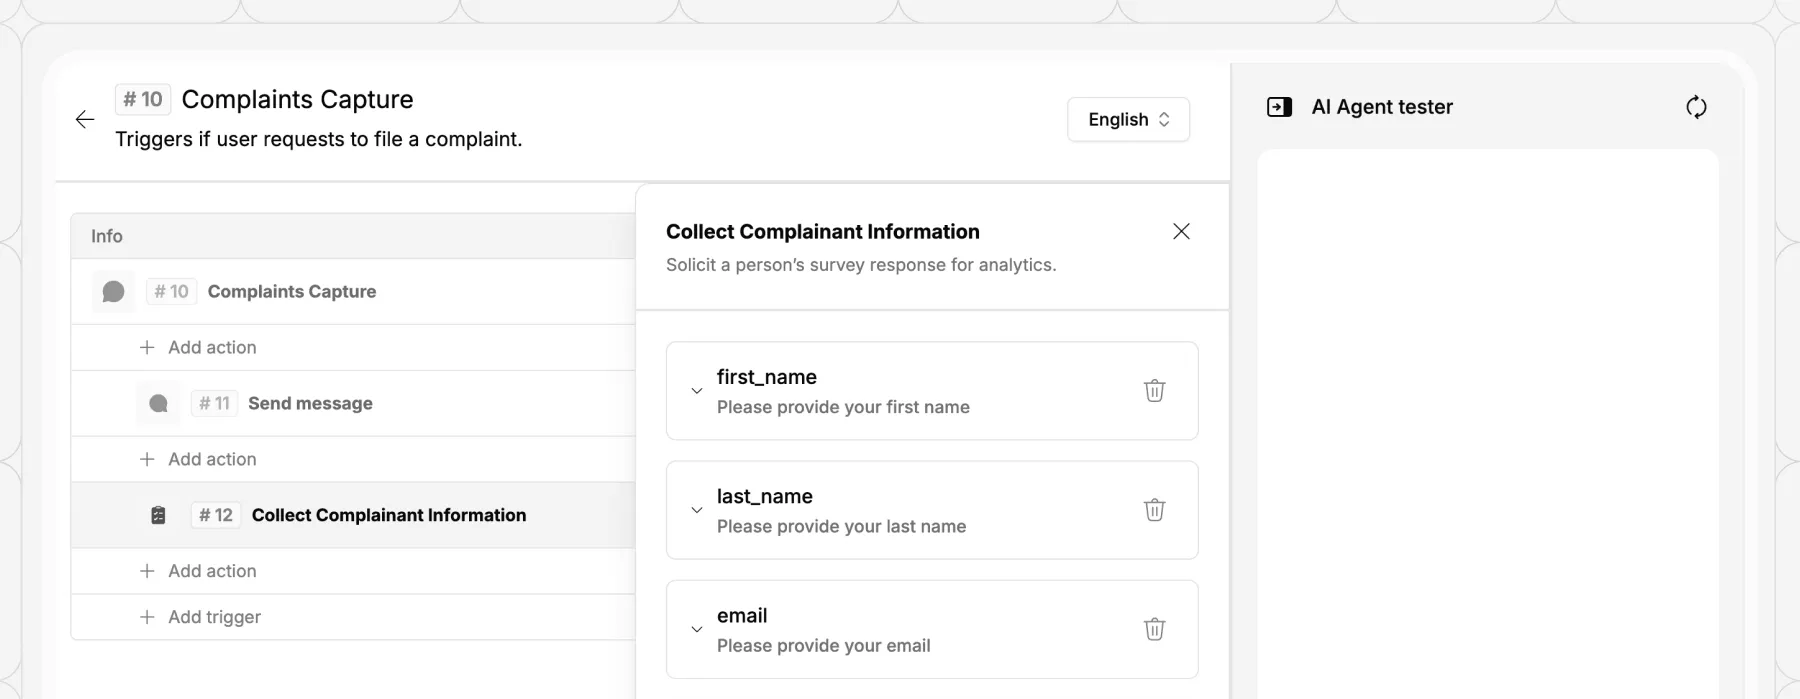
3. Collect complainant information via Survey
Capture the person's contact details with field-level validation.
Add an Ask Survey action to collect the required information. Unlike a form, Ask Survey sends each question as a separate chat message and waits for a response before moving to the next, keeping the experience conversational.
When setting up each field, assign it a chat variable name – a short label you define freely. Proto uses this to hold the person's answer for the rest of the conversation, so it can be referenced by any subsequent action, for example to address them by name or pre-fill a ticket with their details.
Action title: Collect Complainant Information
Basic information to collect:
For each field, set a question – the message the AI agent sends to prompt a response. For fields that expect a specific format, also set an invalid answer reply, which re-prompts the person if their input fails validation (for example, if plain text is entered into the email field). For all fields in this survey, ensure Enable skip is off – all four contact details are required.
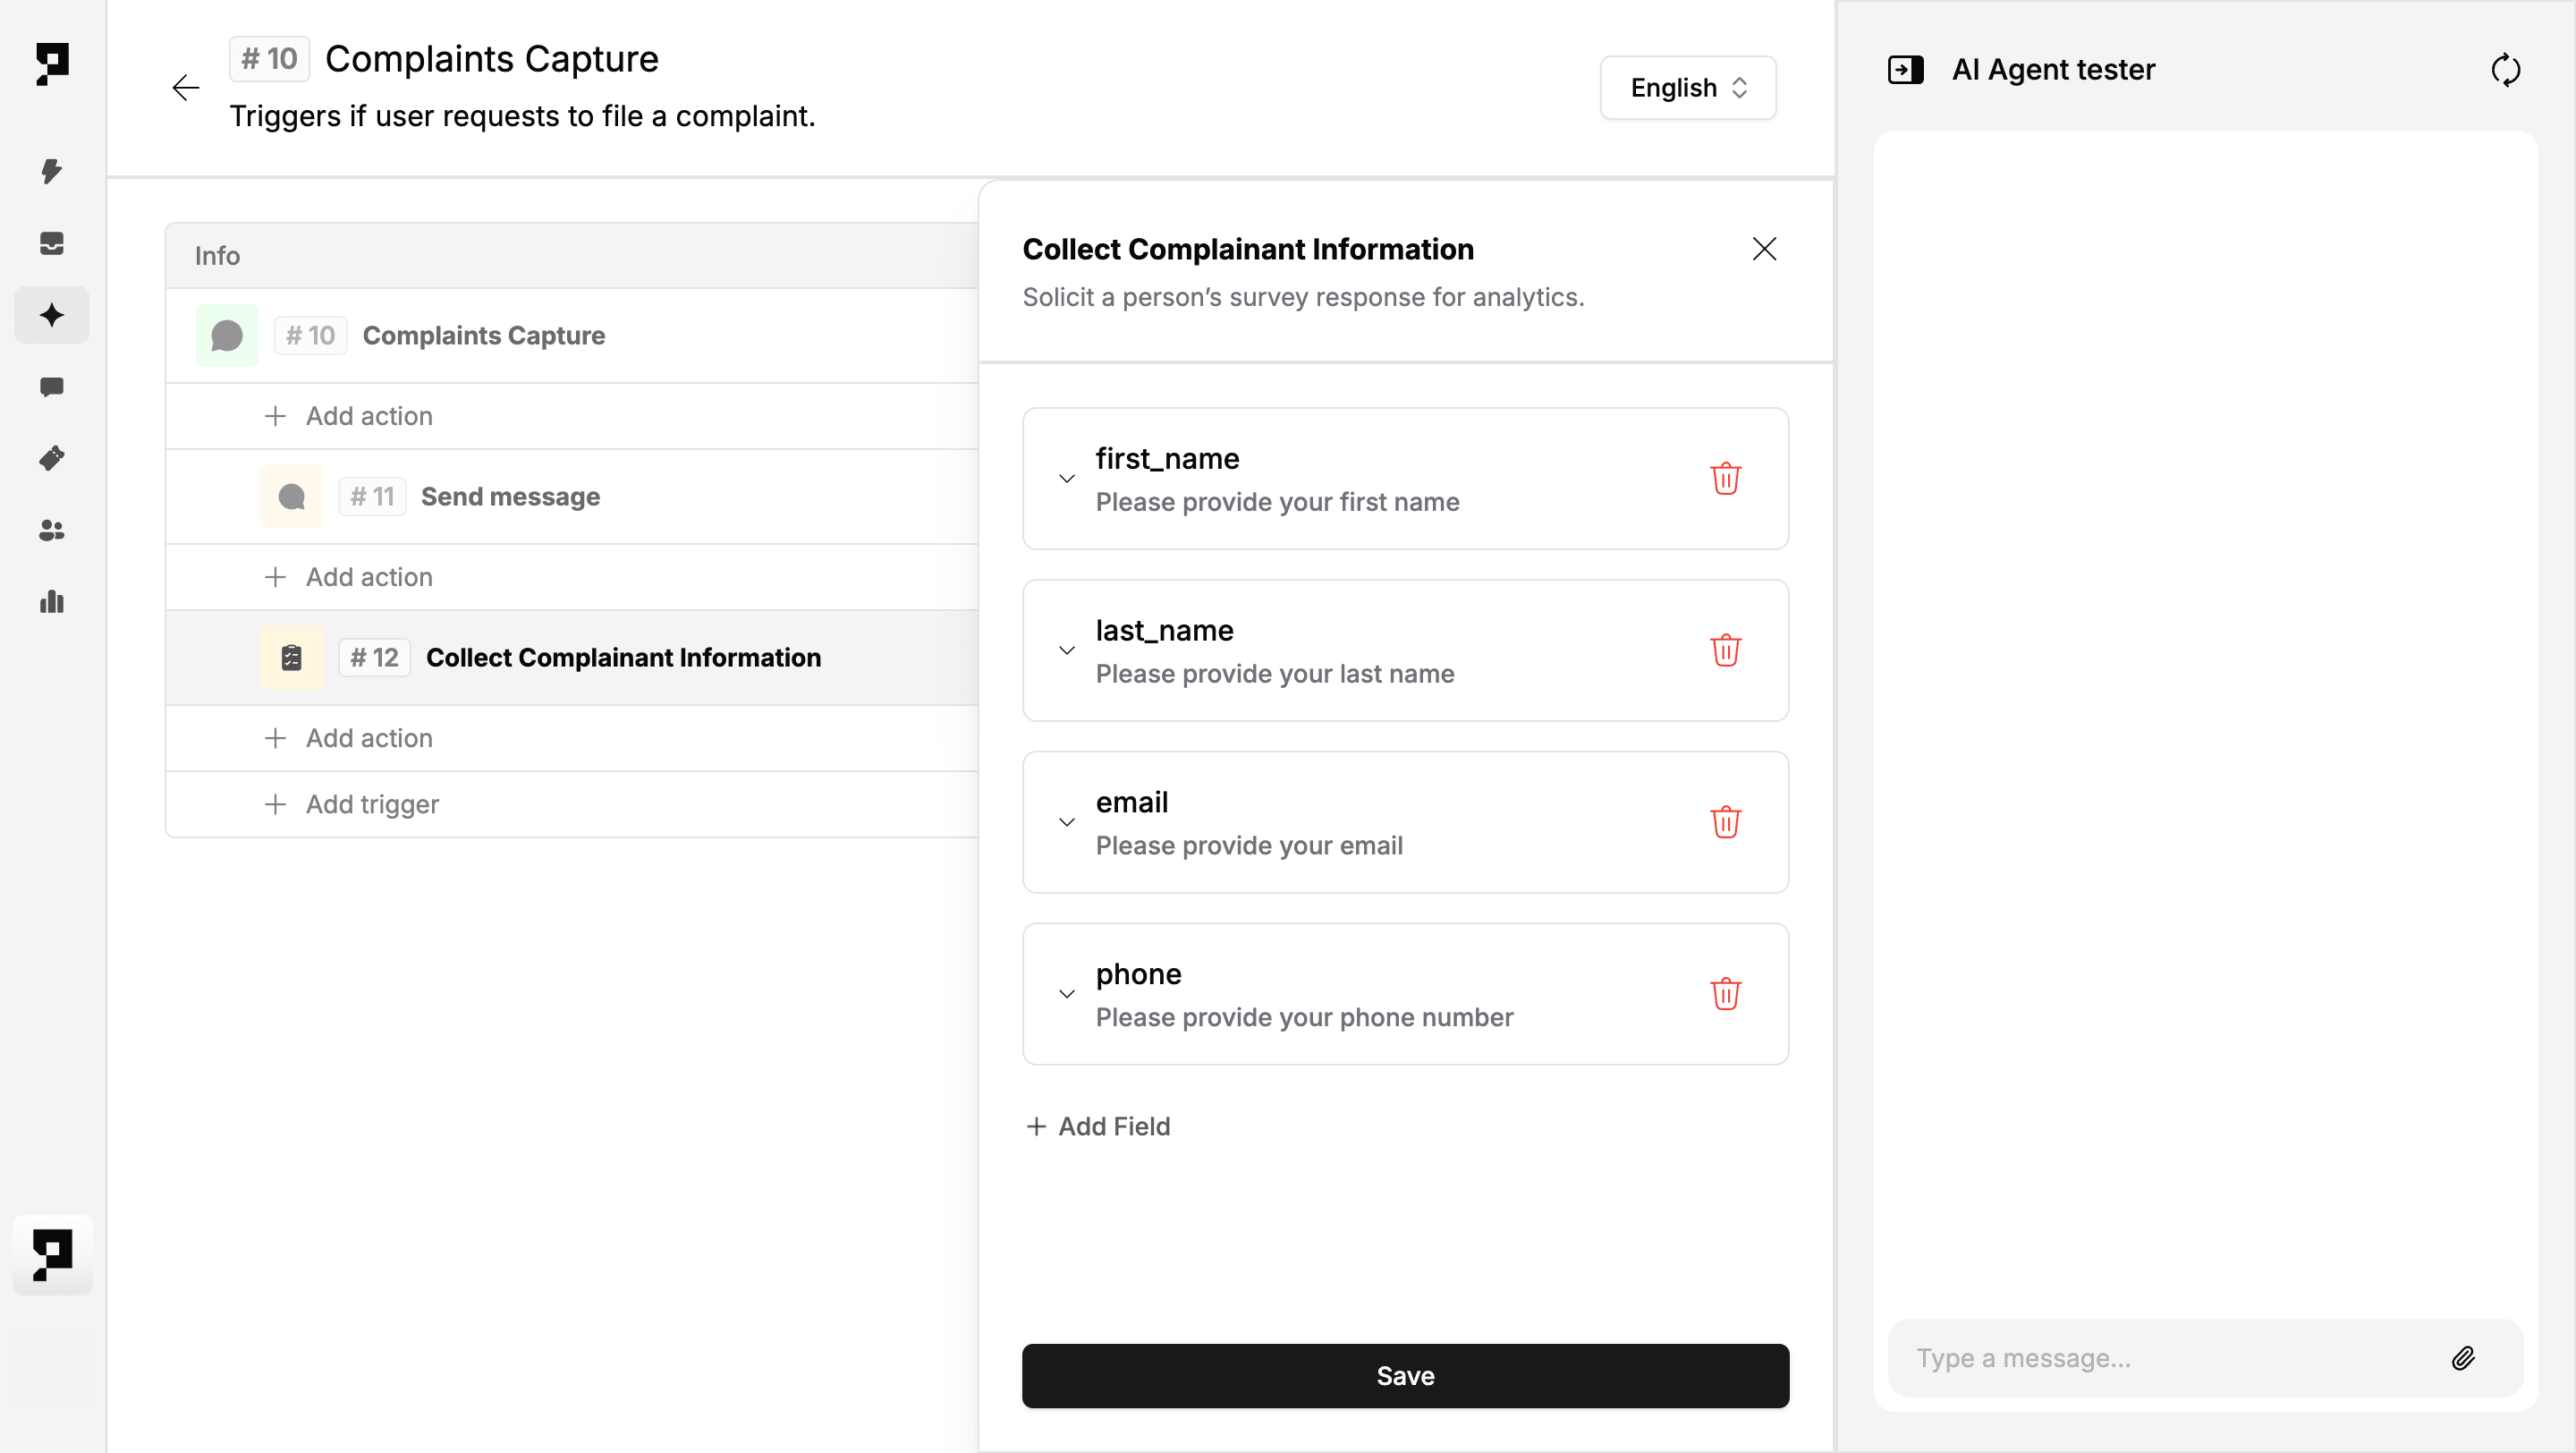
By default, variable values exist for the current chat session only and are not automatically saved to the person's profile in the People module. The one exception: when a ticket is created during the same session, Proto saves the name, email, and phone values to the person's profile at that point. View Step 8 for more details.
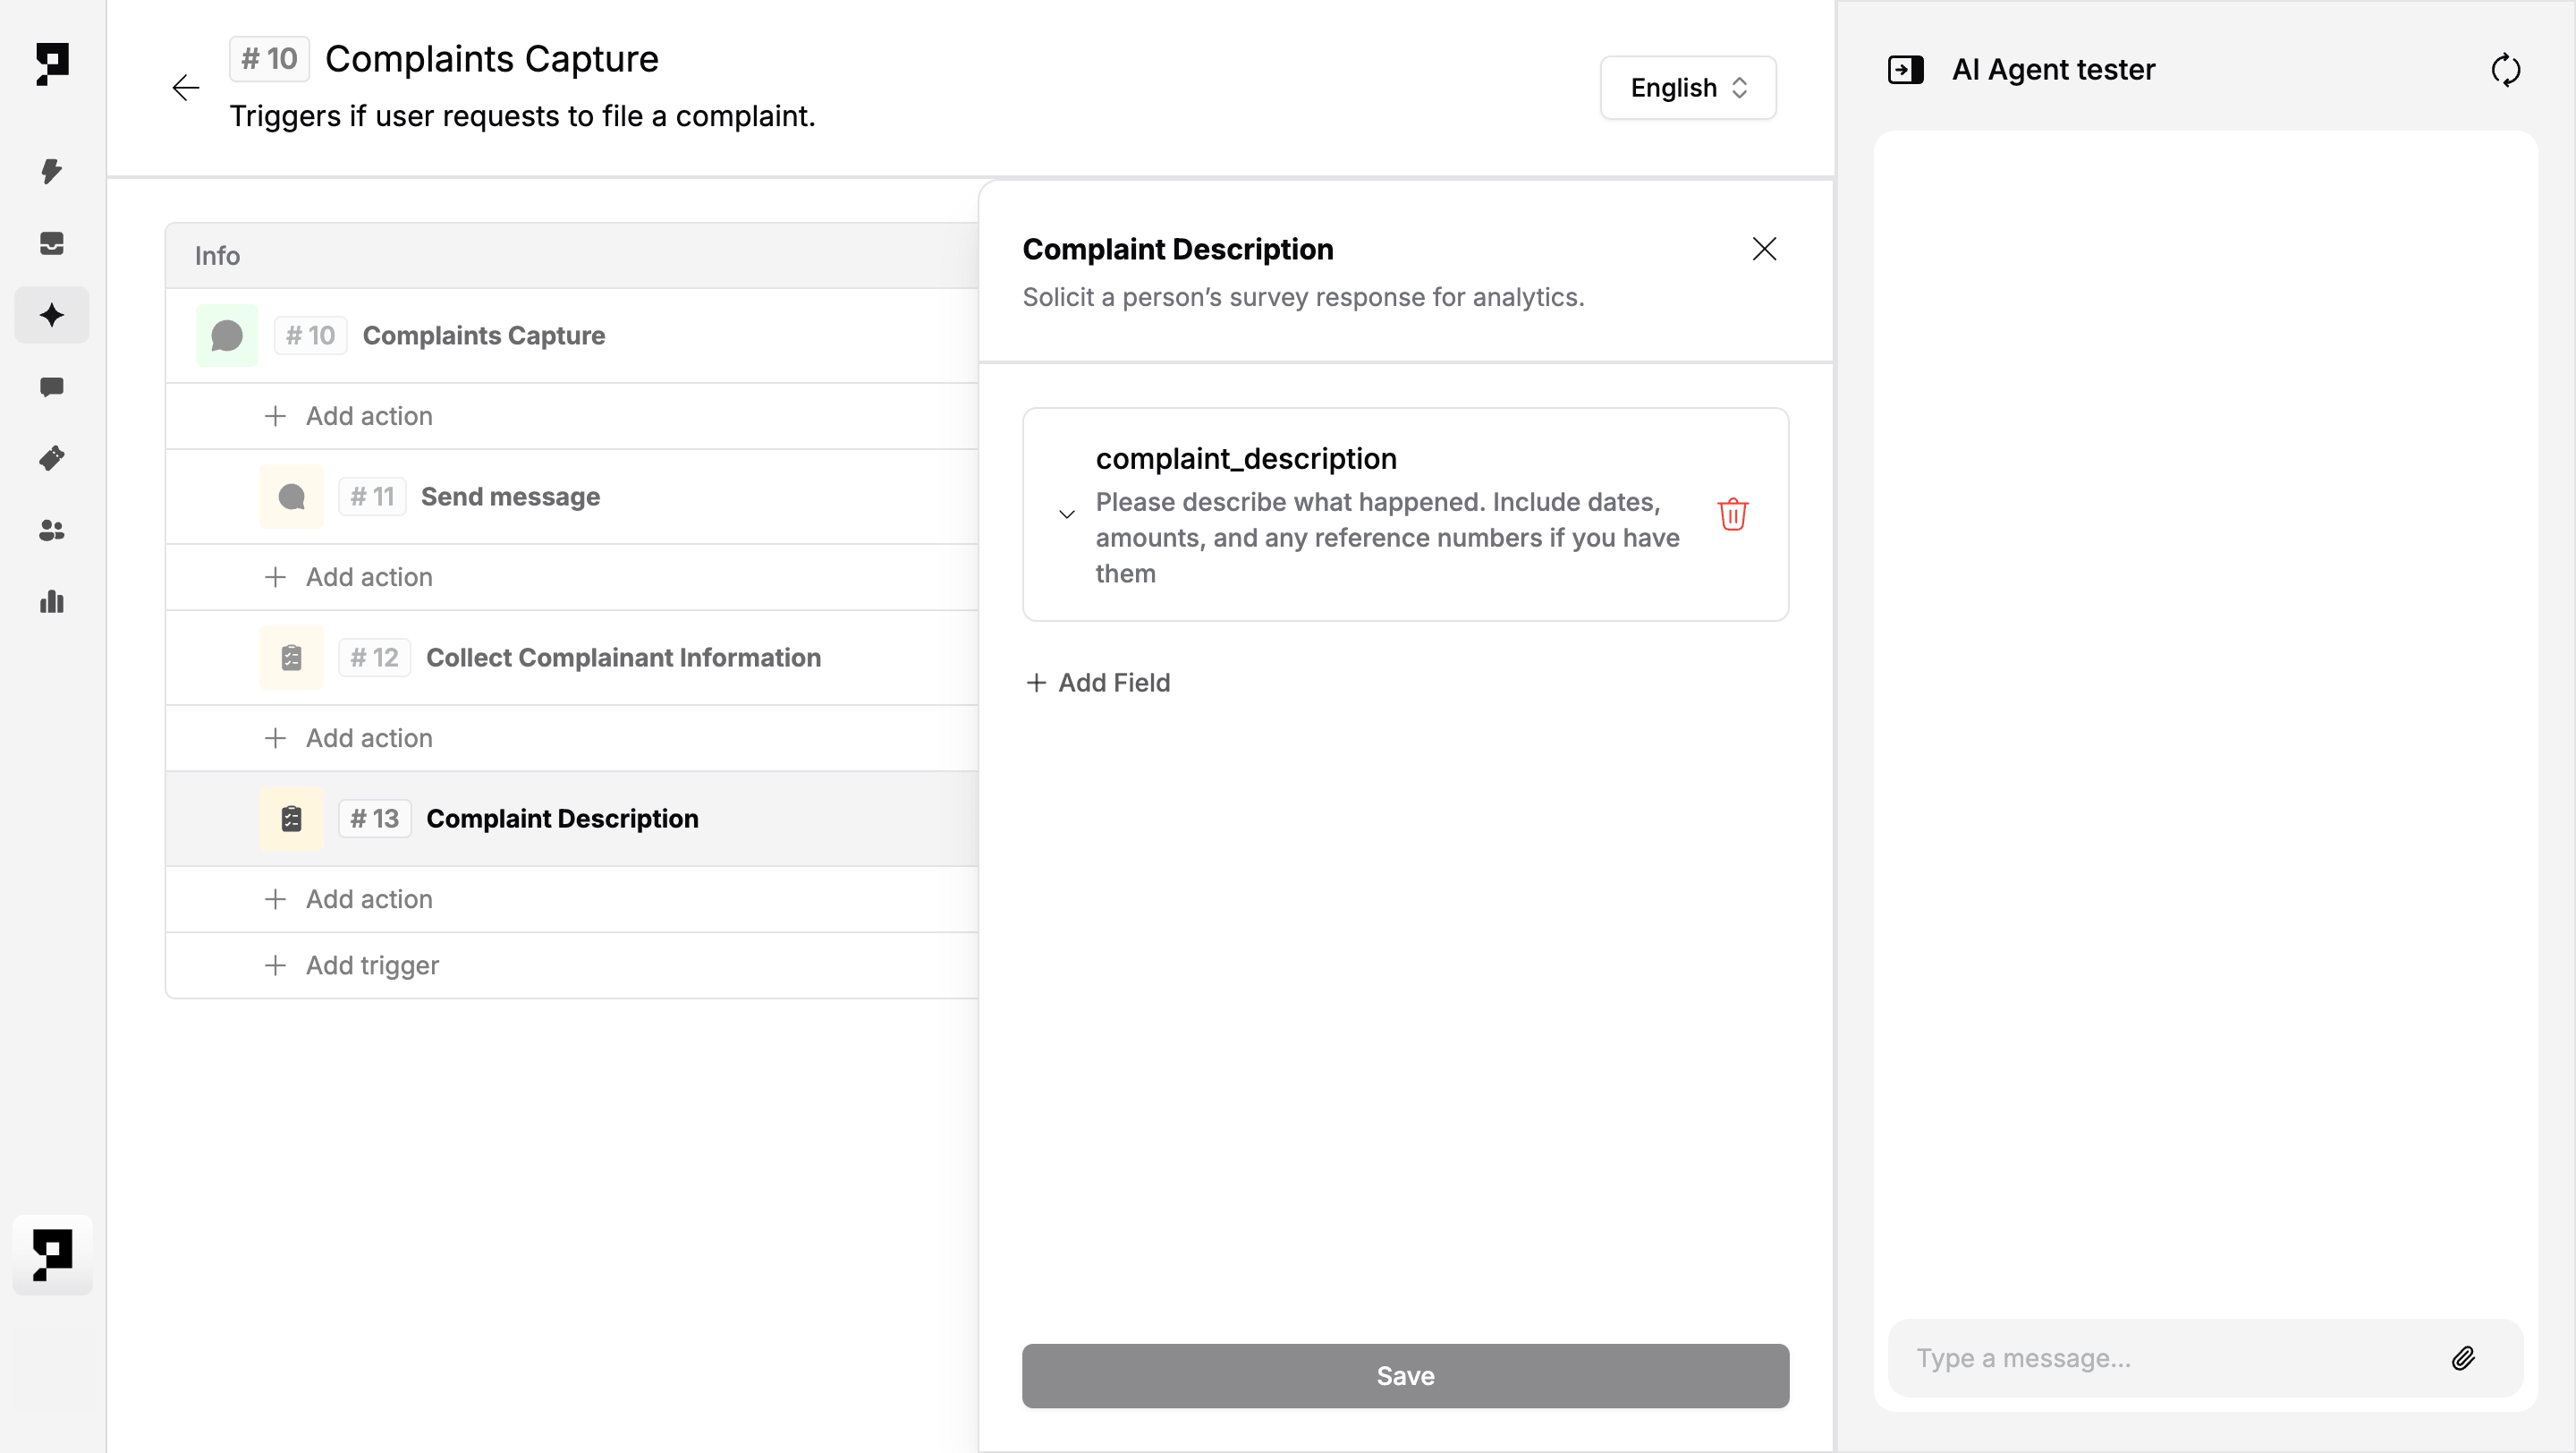
4. Collect the complaint description
Capture a free-text account of the complaint, kept separate from contact details for a cleaner conversational flow.
Add a second Ask Survey action. Action title: Complaint Description
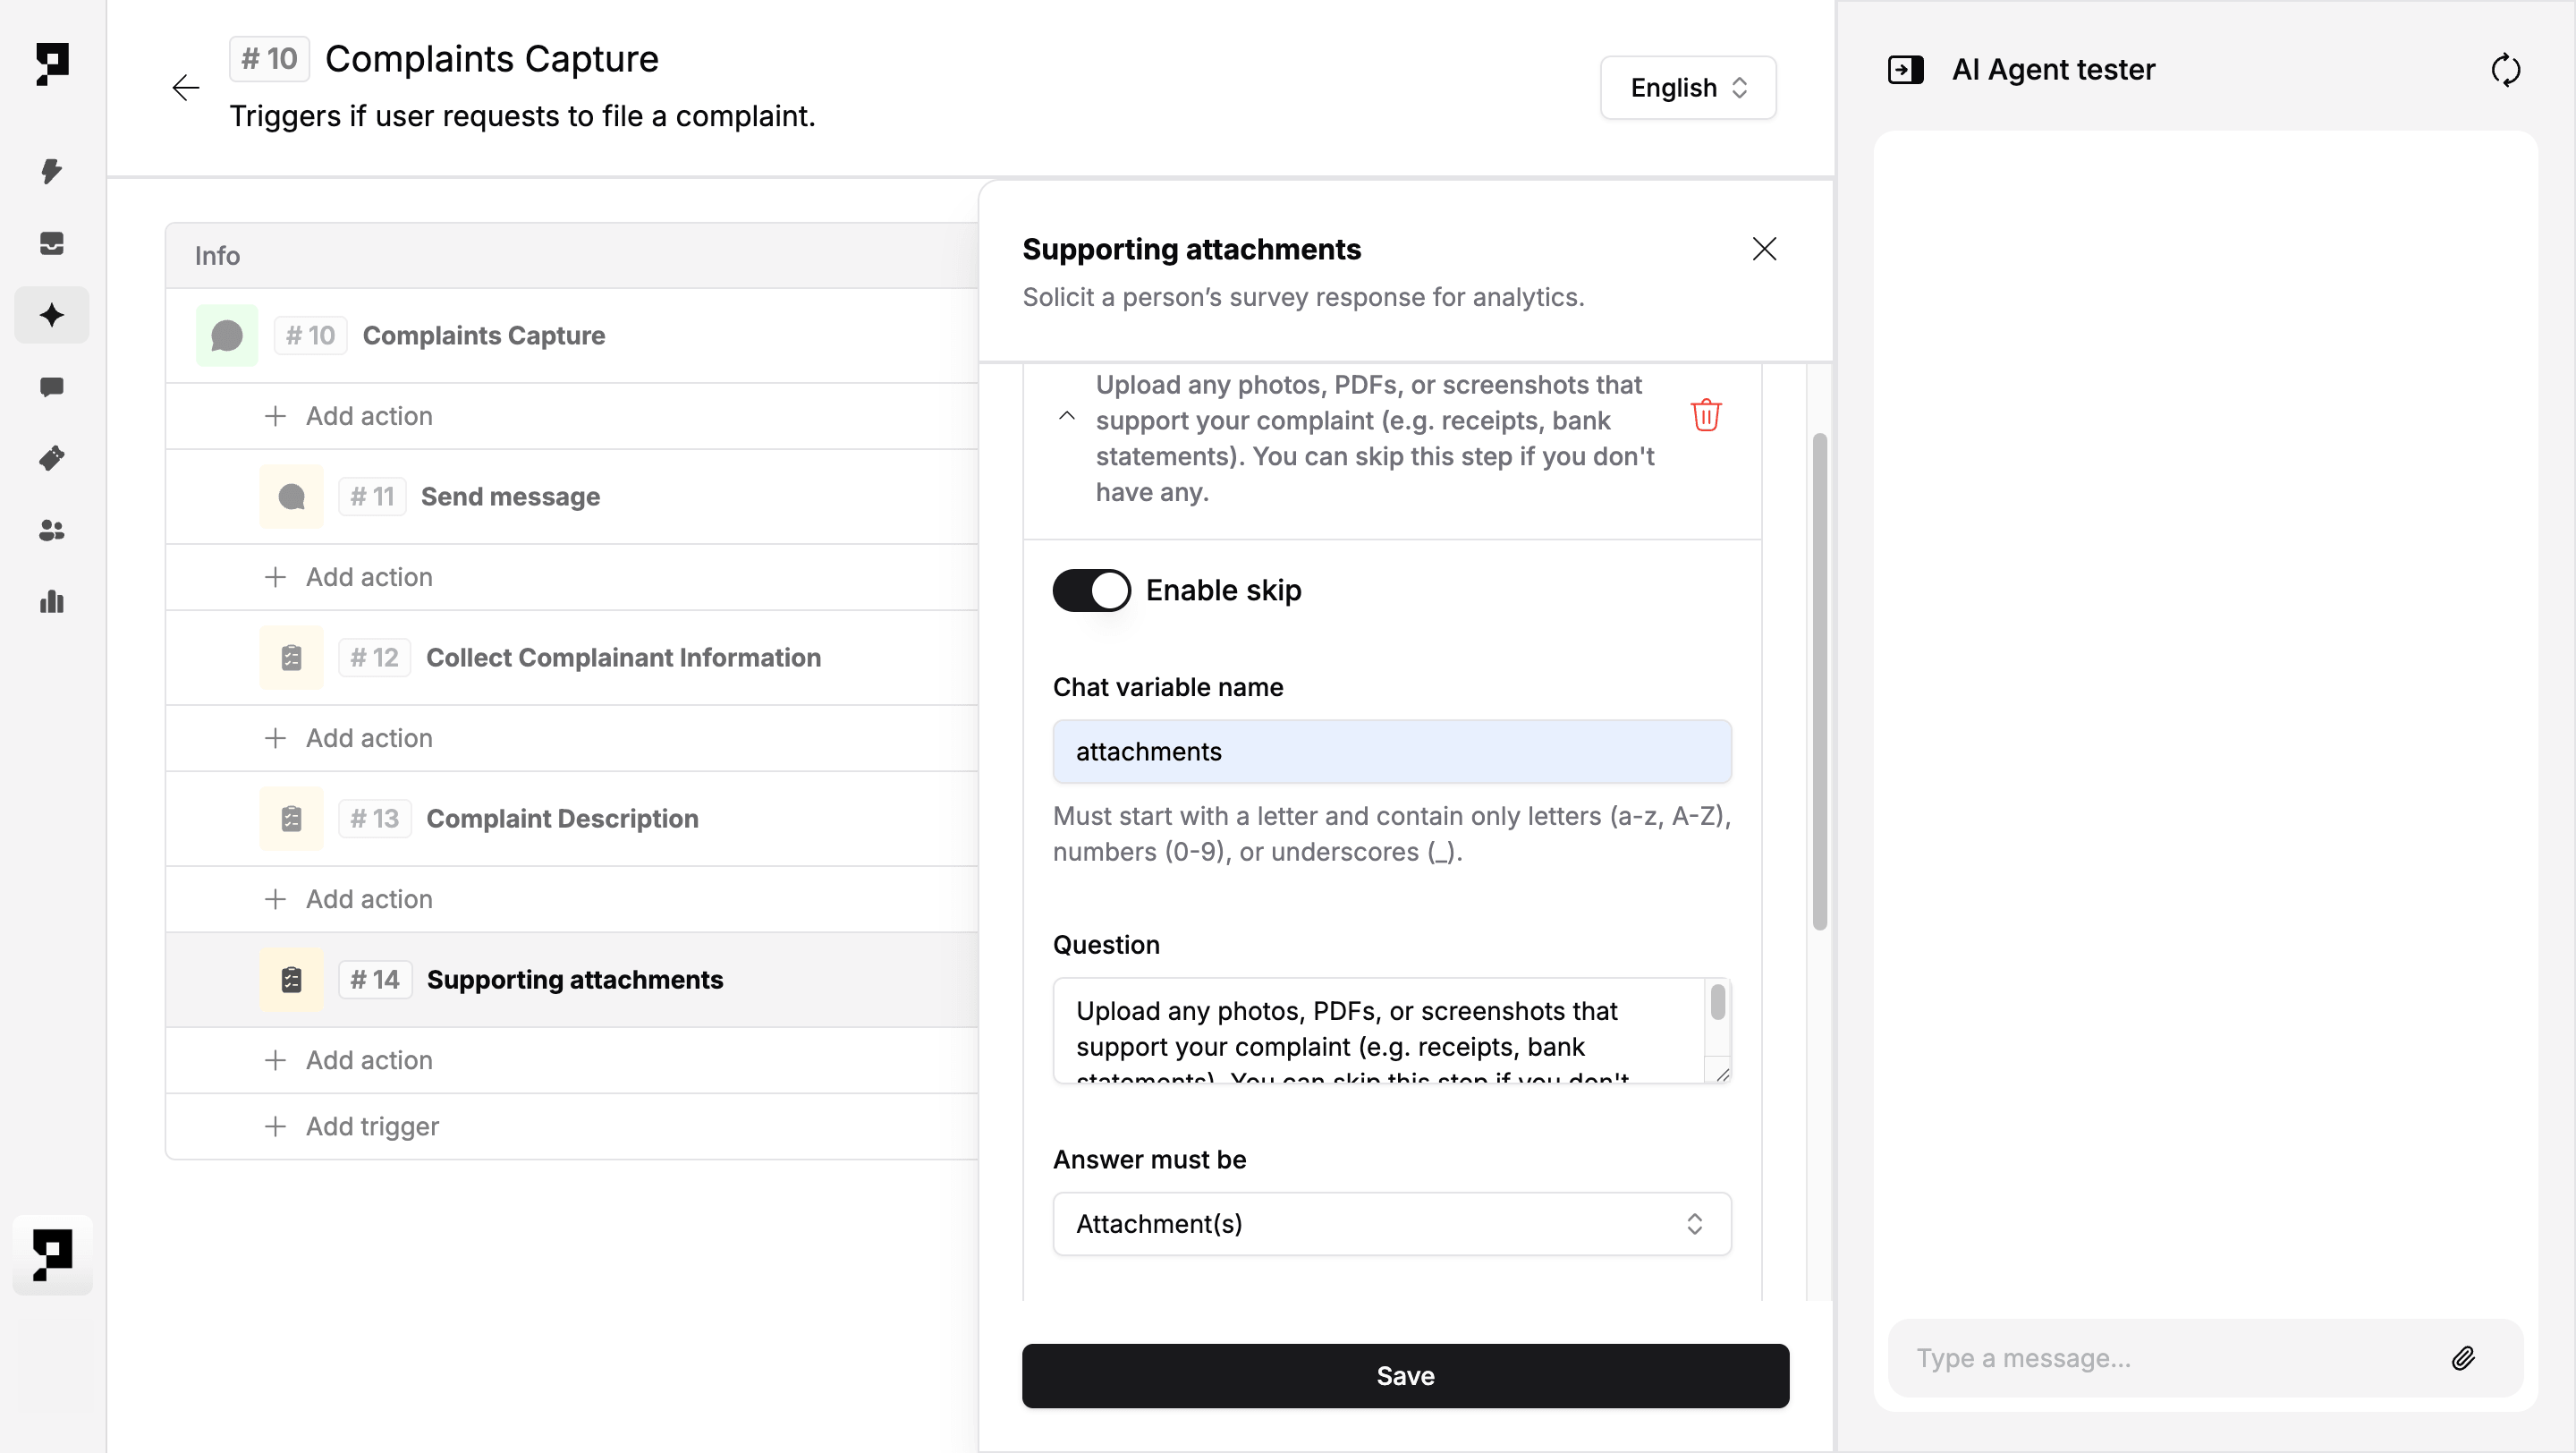
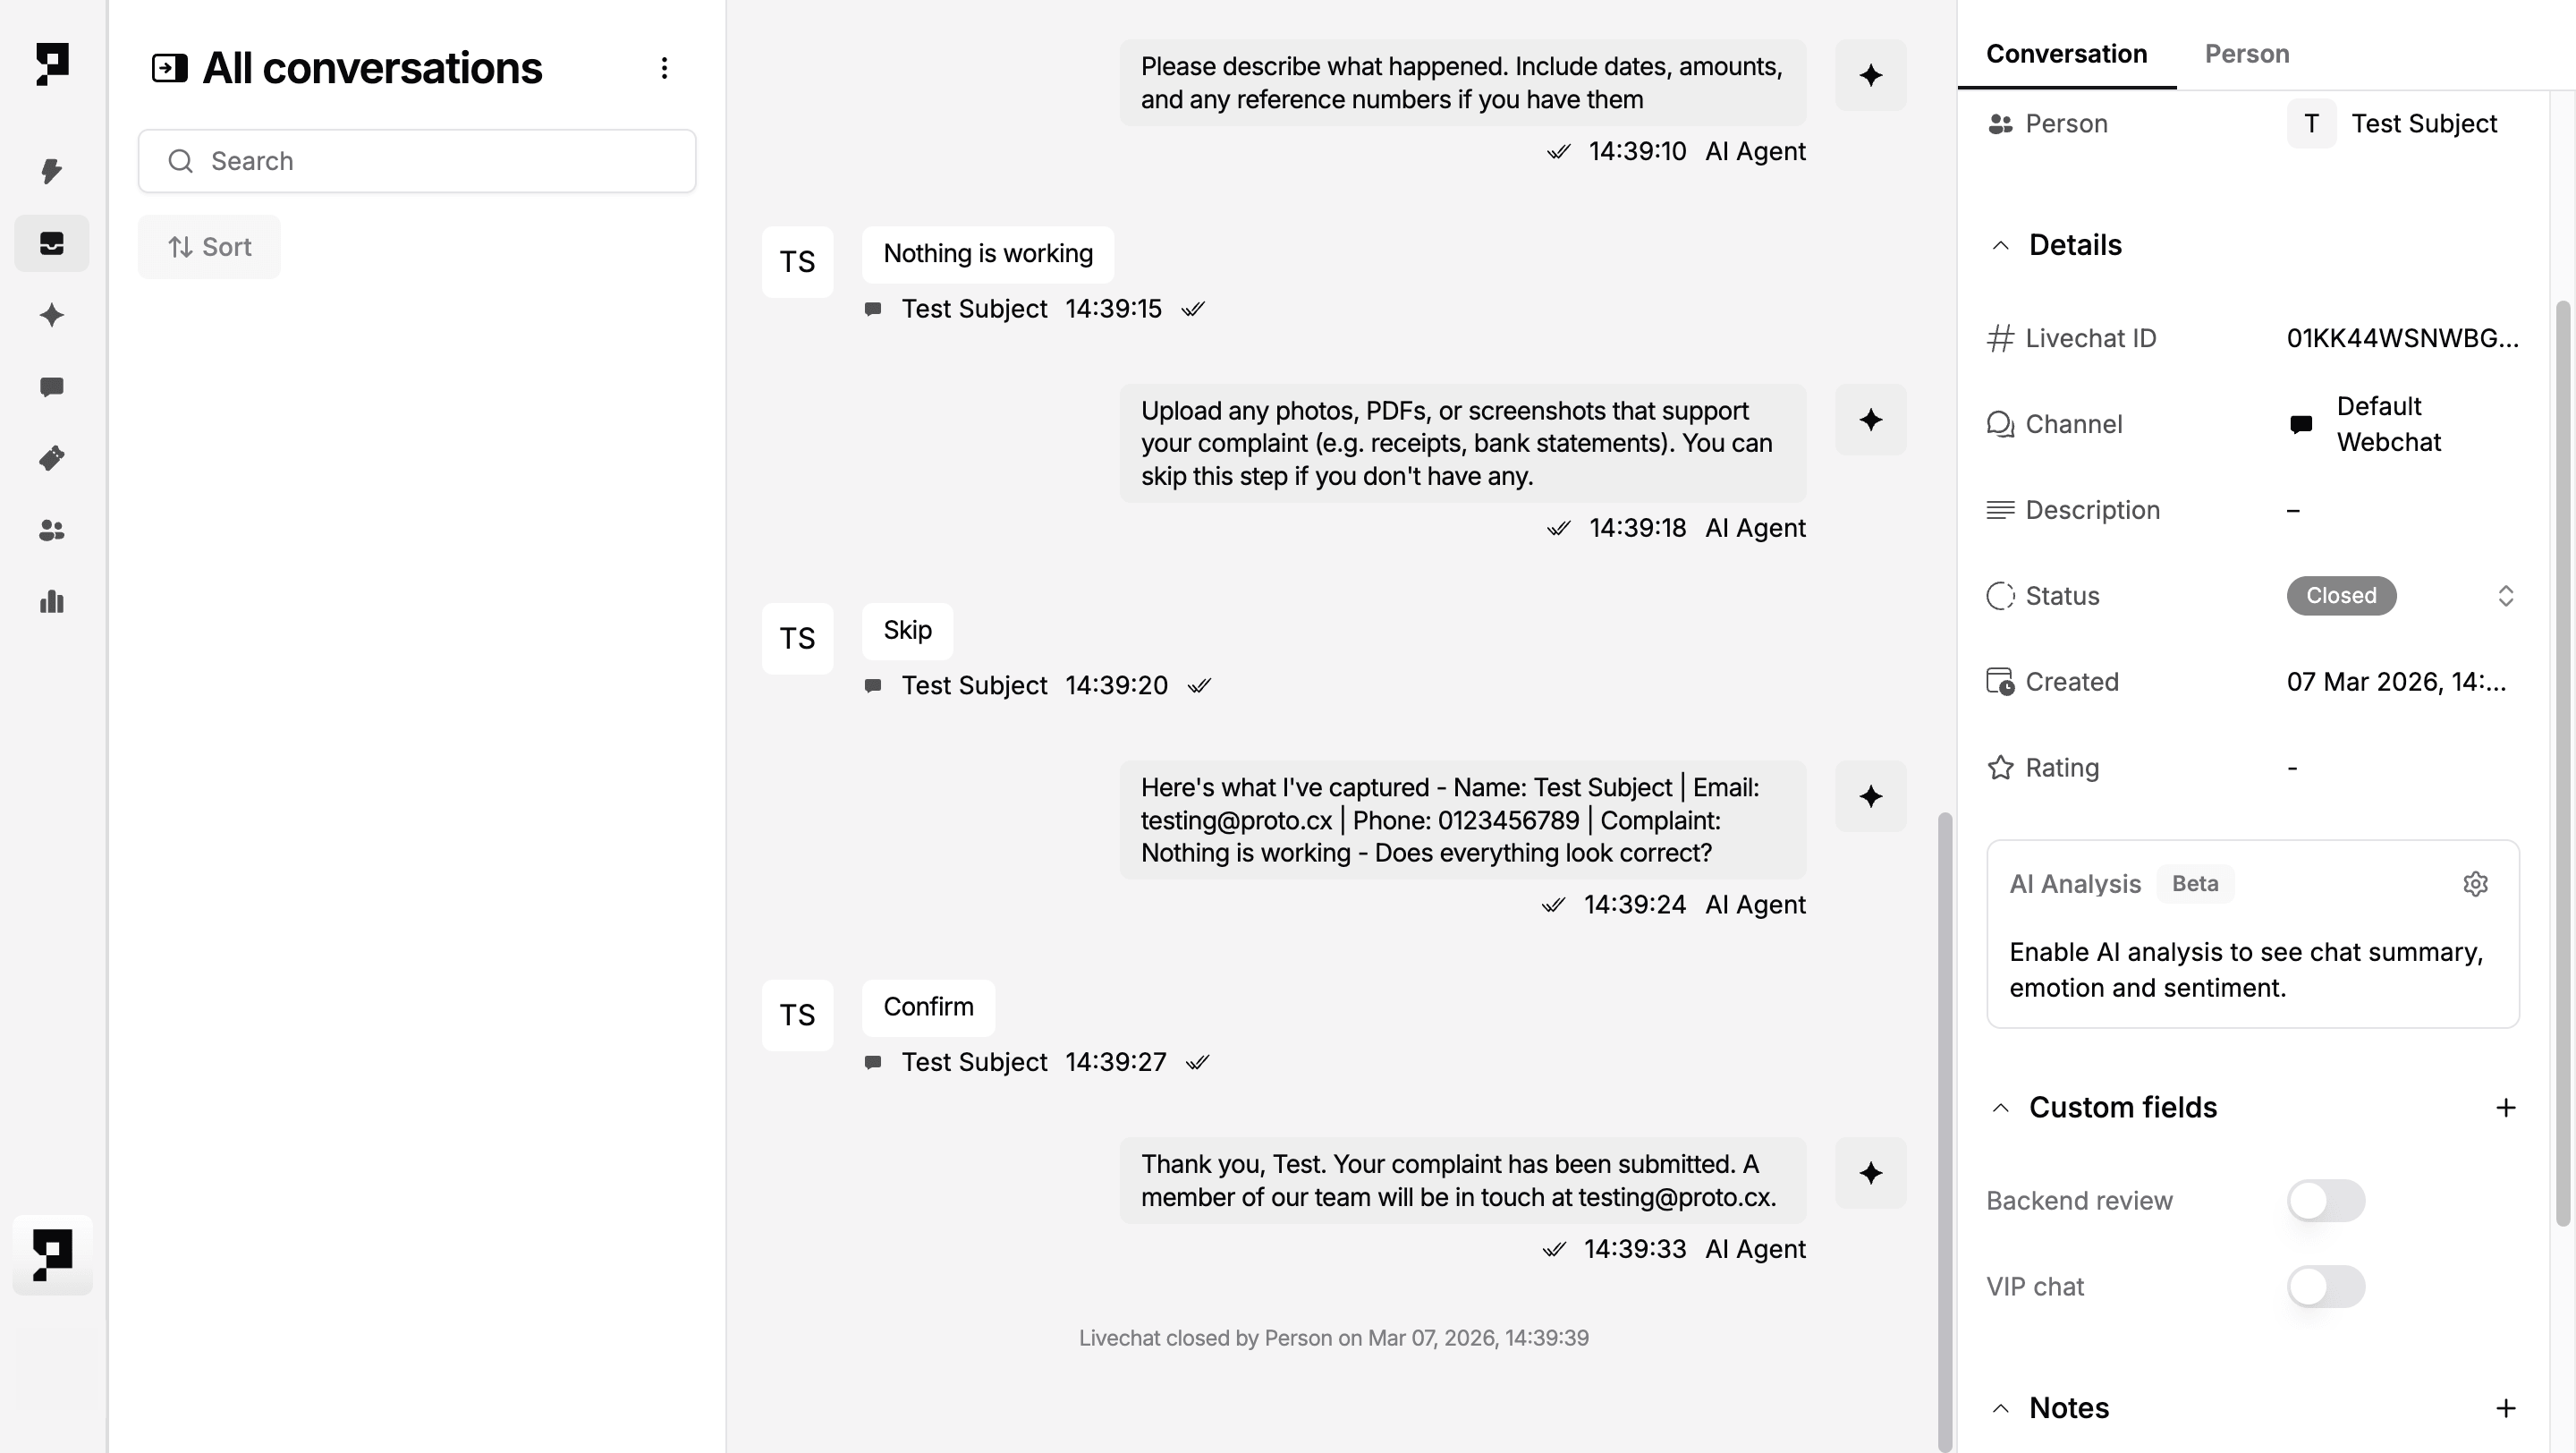
5. Collect supporting attachments
Allow the person to upload supporting evidence. This step is optional.
Add a third Ask Survey action and set Enable skip to on.
Action title: Supporting attachments
6. Verify collected data with the person
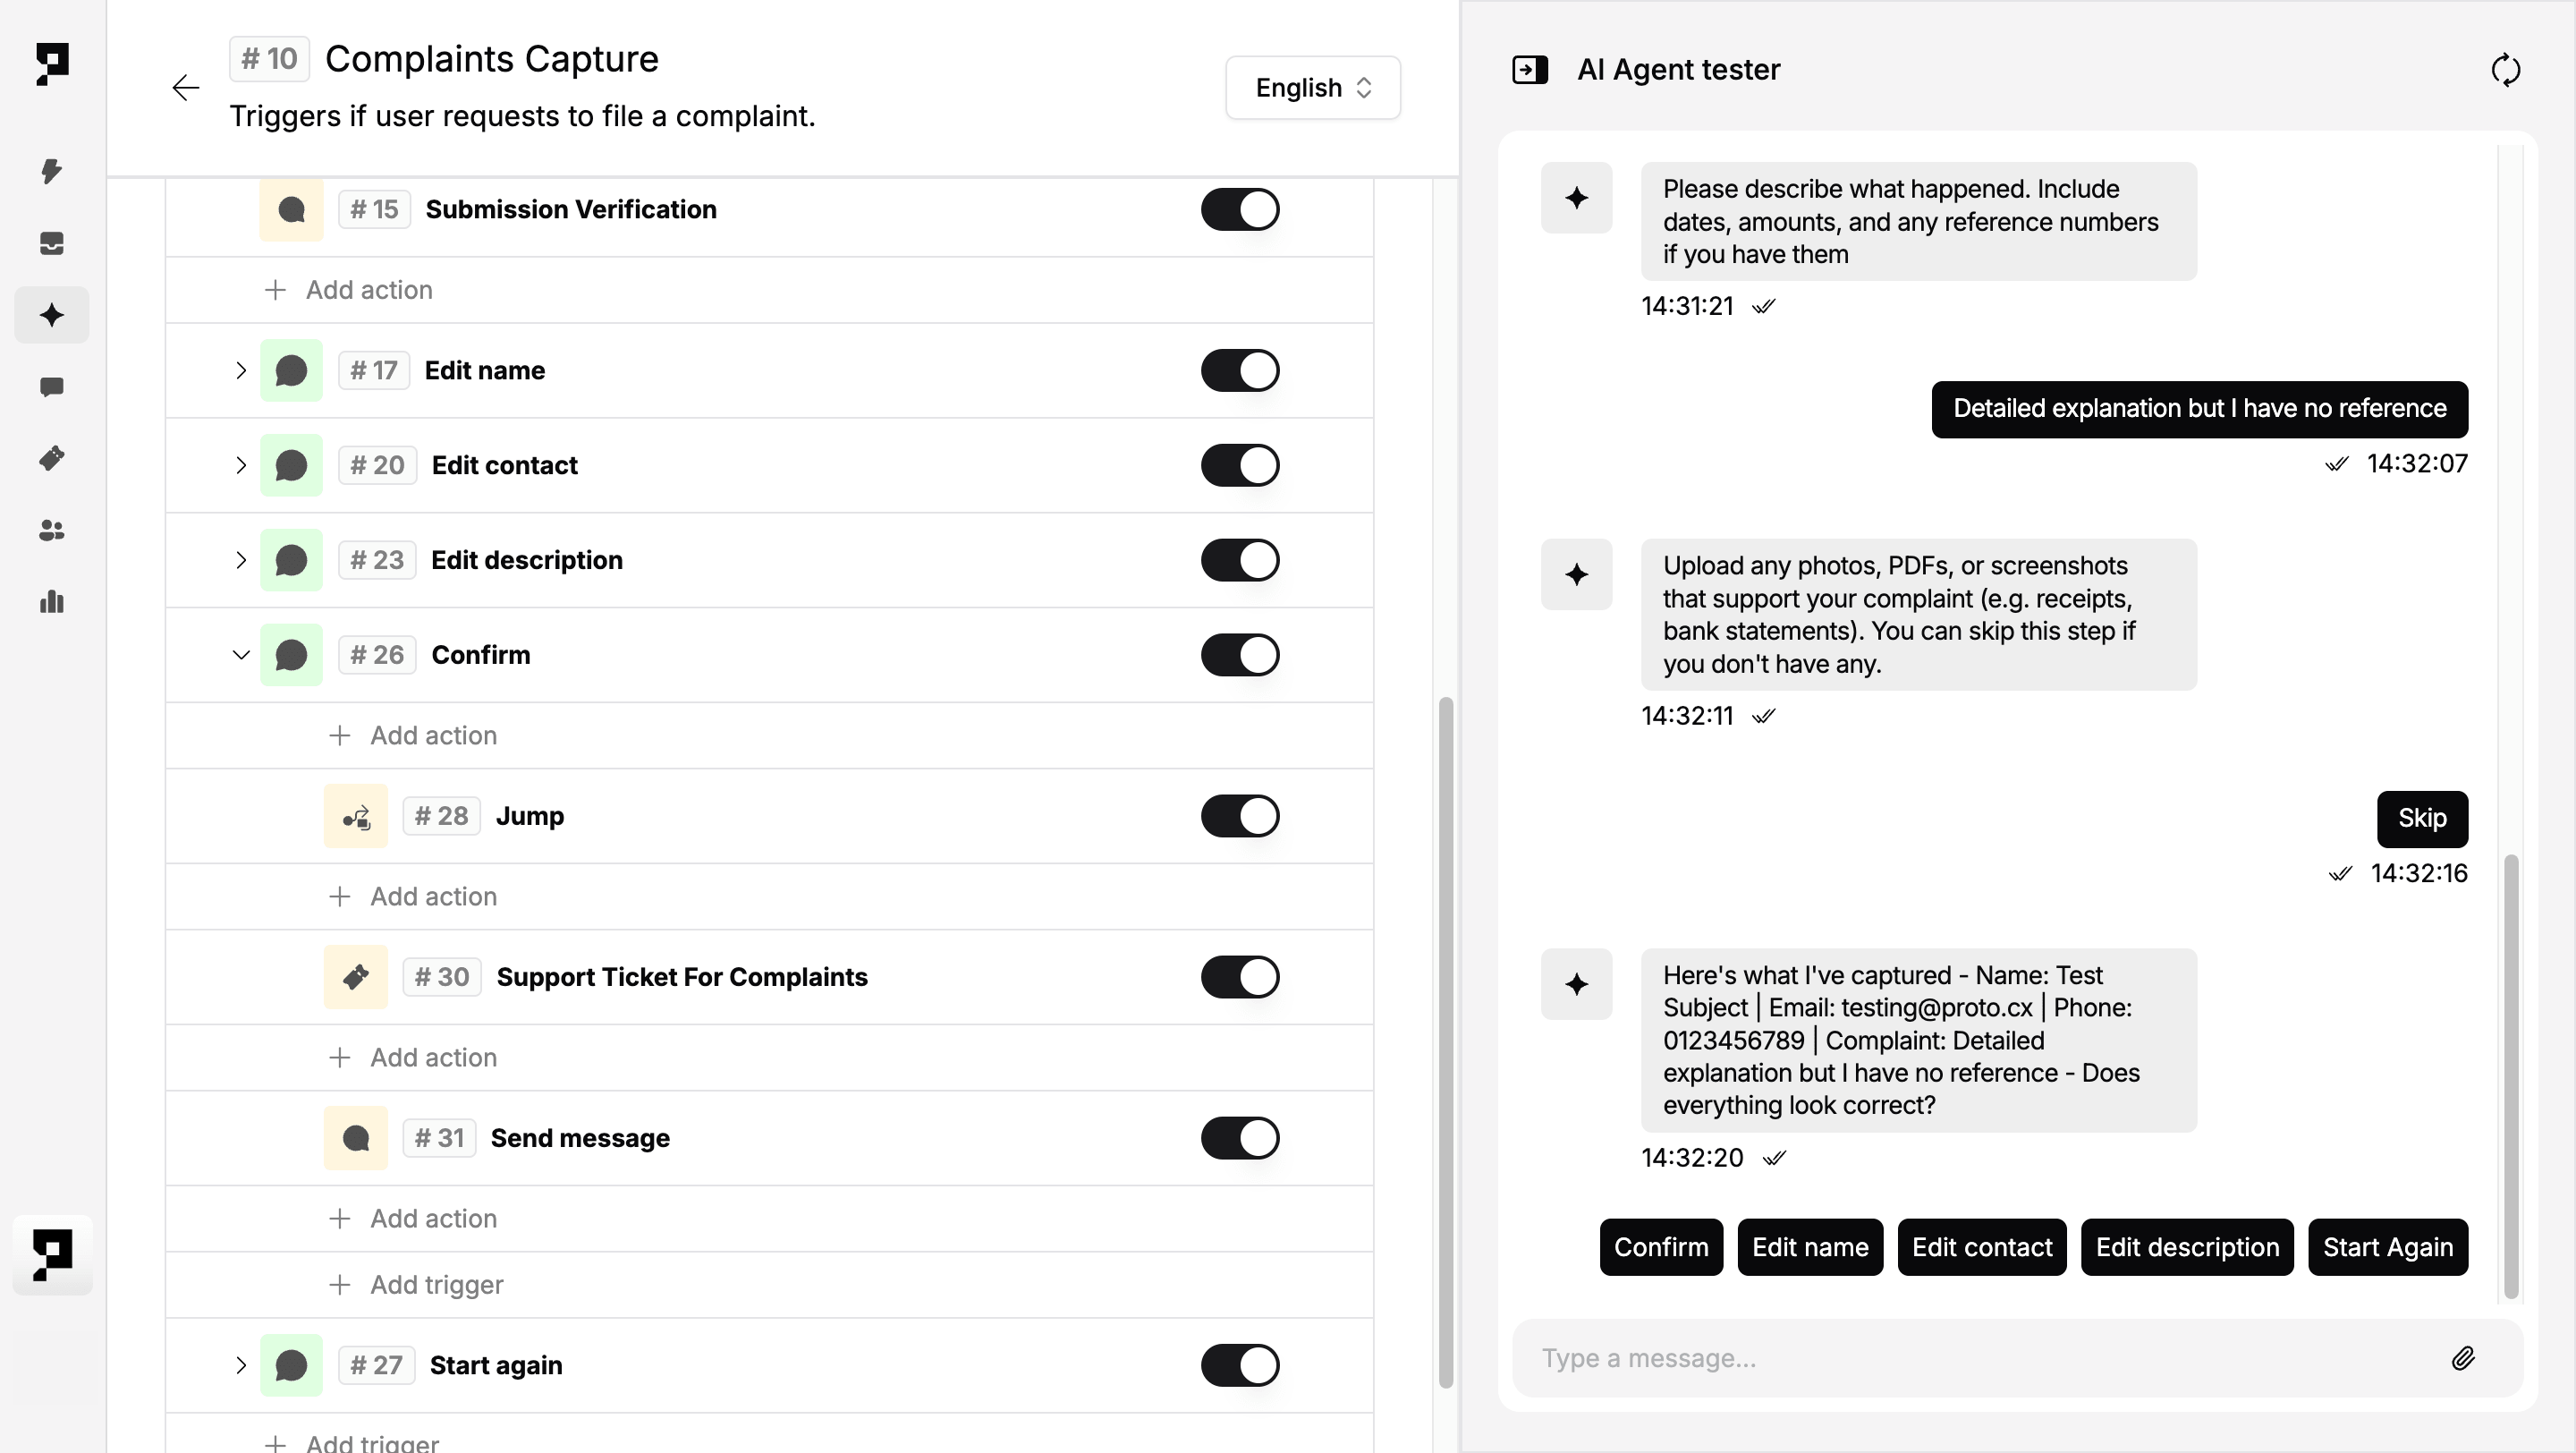
Confirm all details back to the person and allow them to correct any field before the complaint is submitted.
Add a Send Message action to display the collected data with Quick Reply options to confirm or edit.
Action title: Submission verification
Message:
"Here's what I've captured – Name: {first_name} {last_name} | Email: {email} | Phone: {phone} | Complaint: {complaint_description} – Does everything look correct?"
Quick Reply options:
Confirm | Edit name | Edit contact | Edit description | Start again
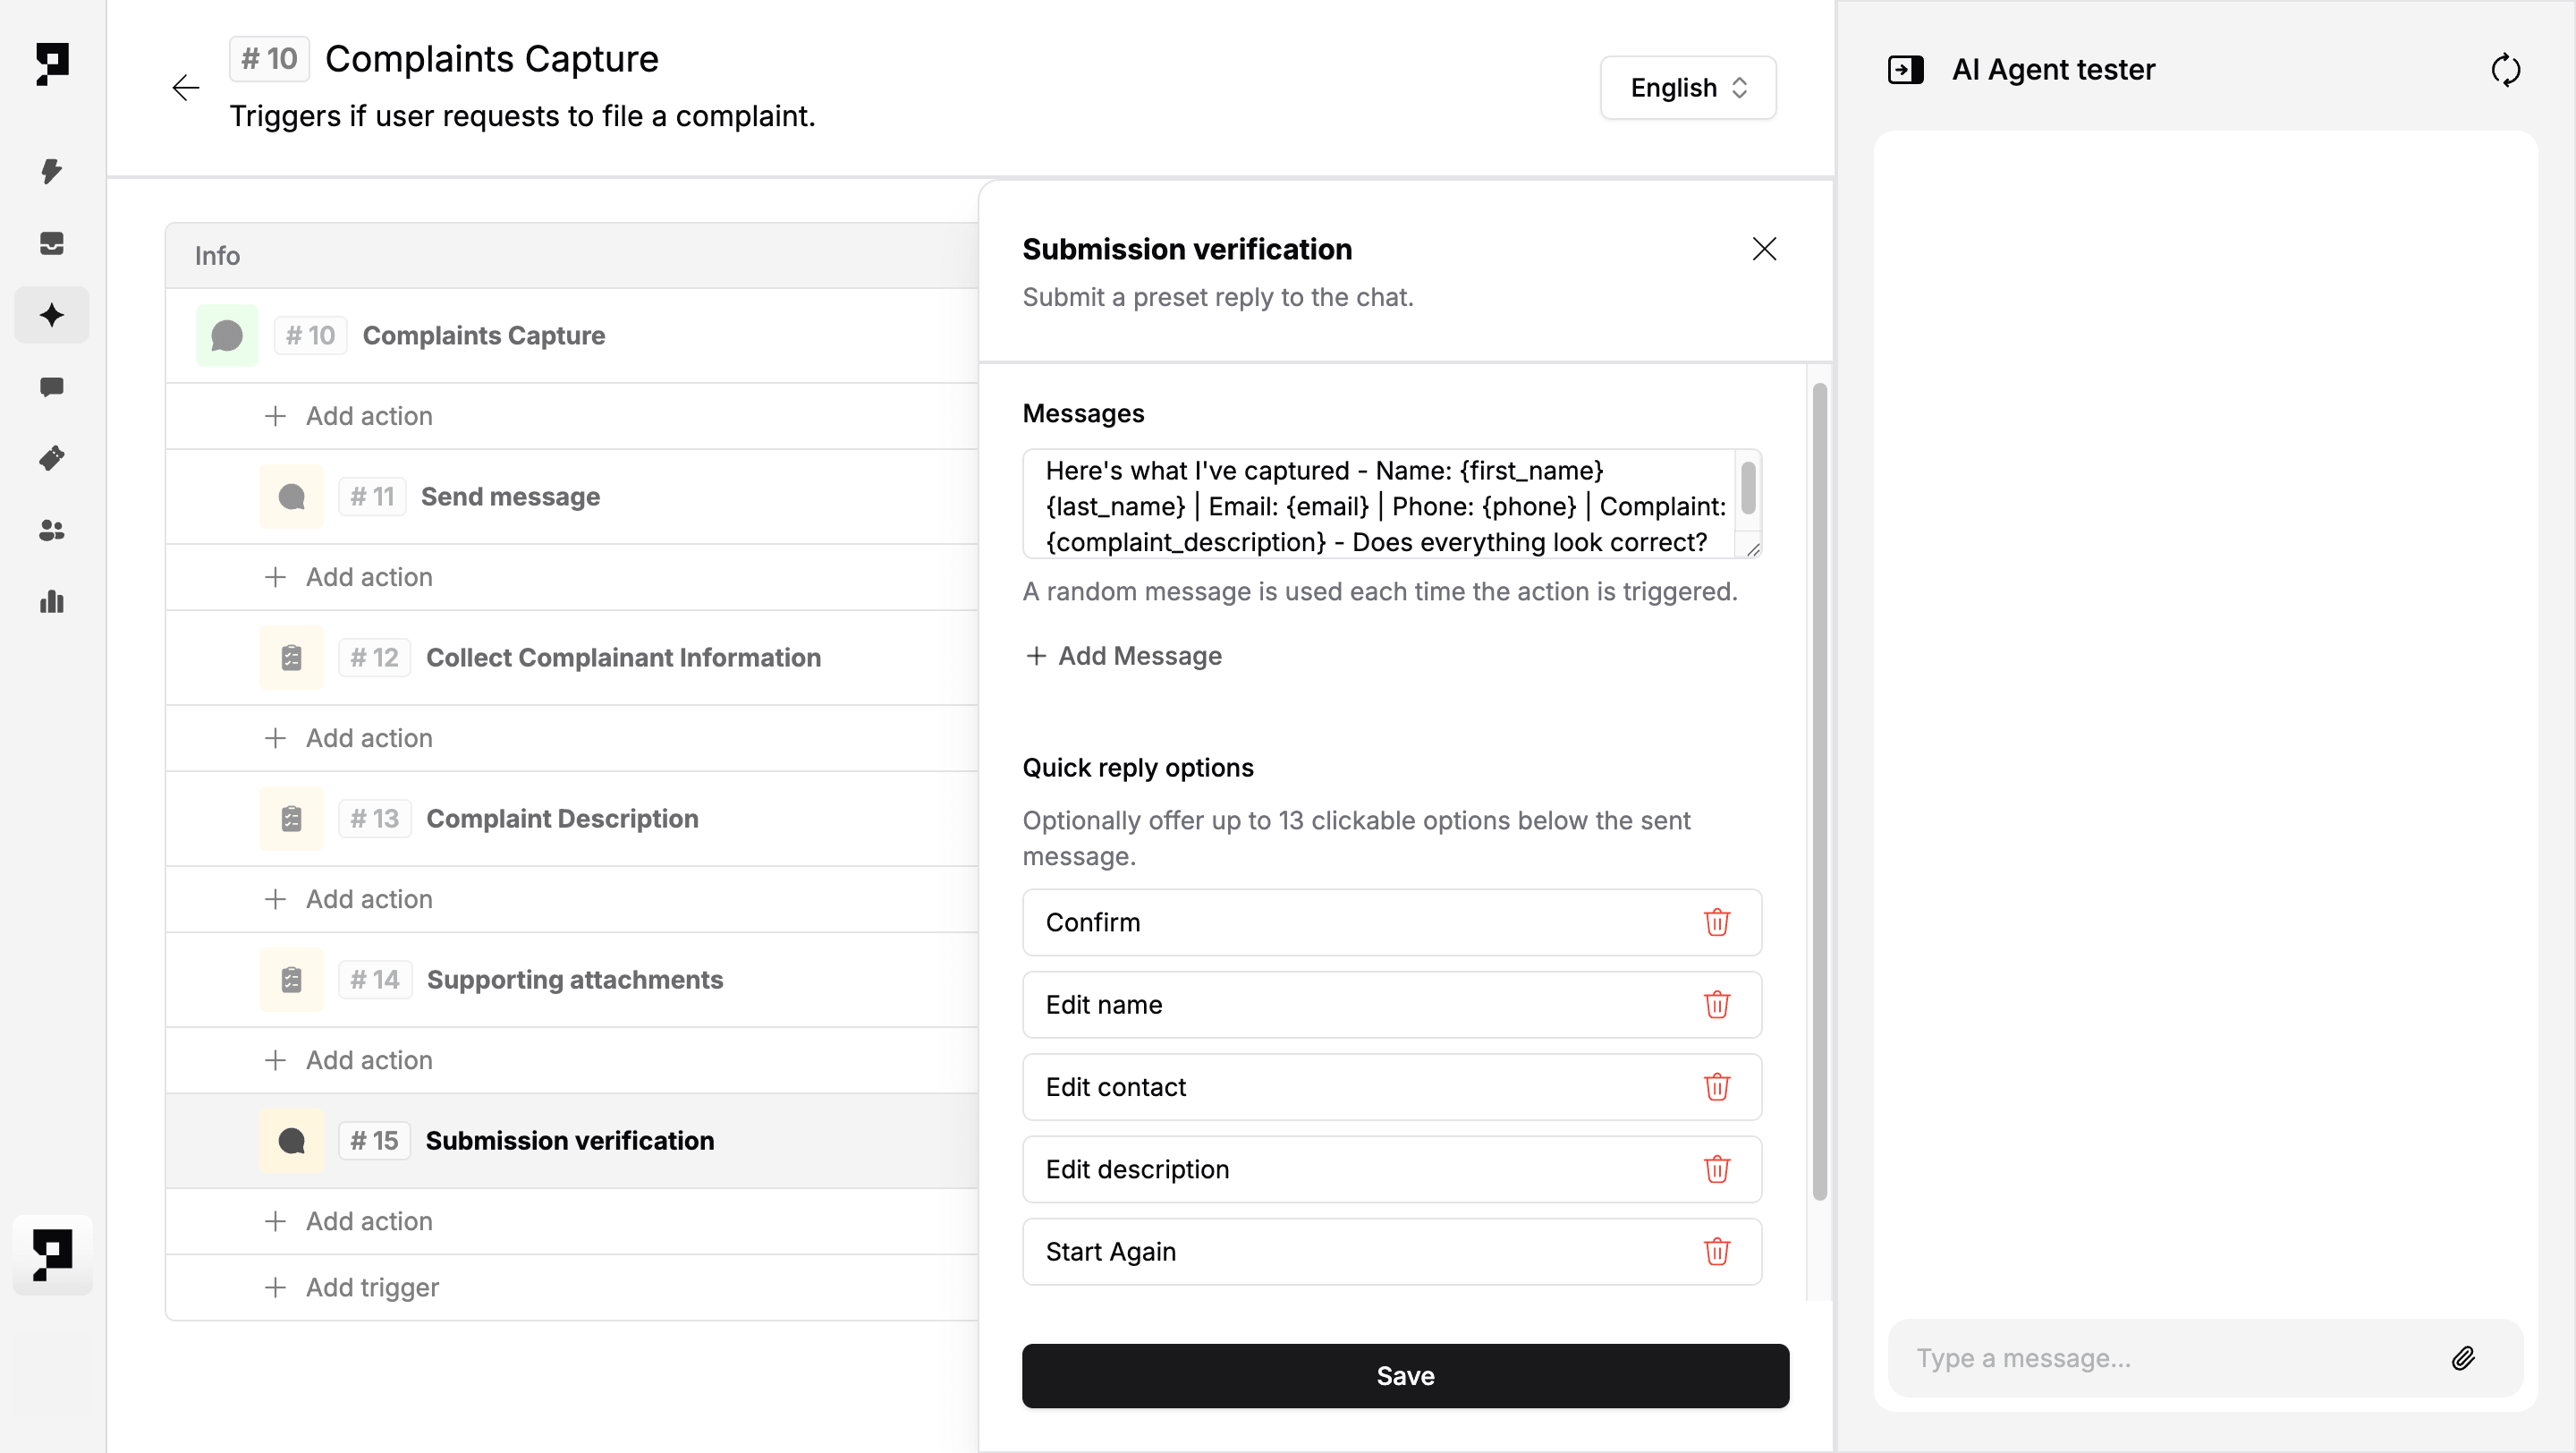
Quick Replies present the person with tappable buttons, but they can still type a free-text response at any point. Each sub-trigger therefore needs training phrases covering both the Quick Reply label and natural language variants. The Start again option jumps back to Step 3 to restart collection from the beginning.
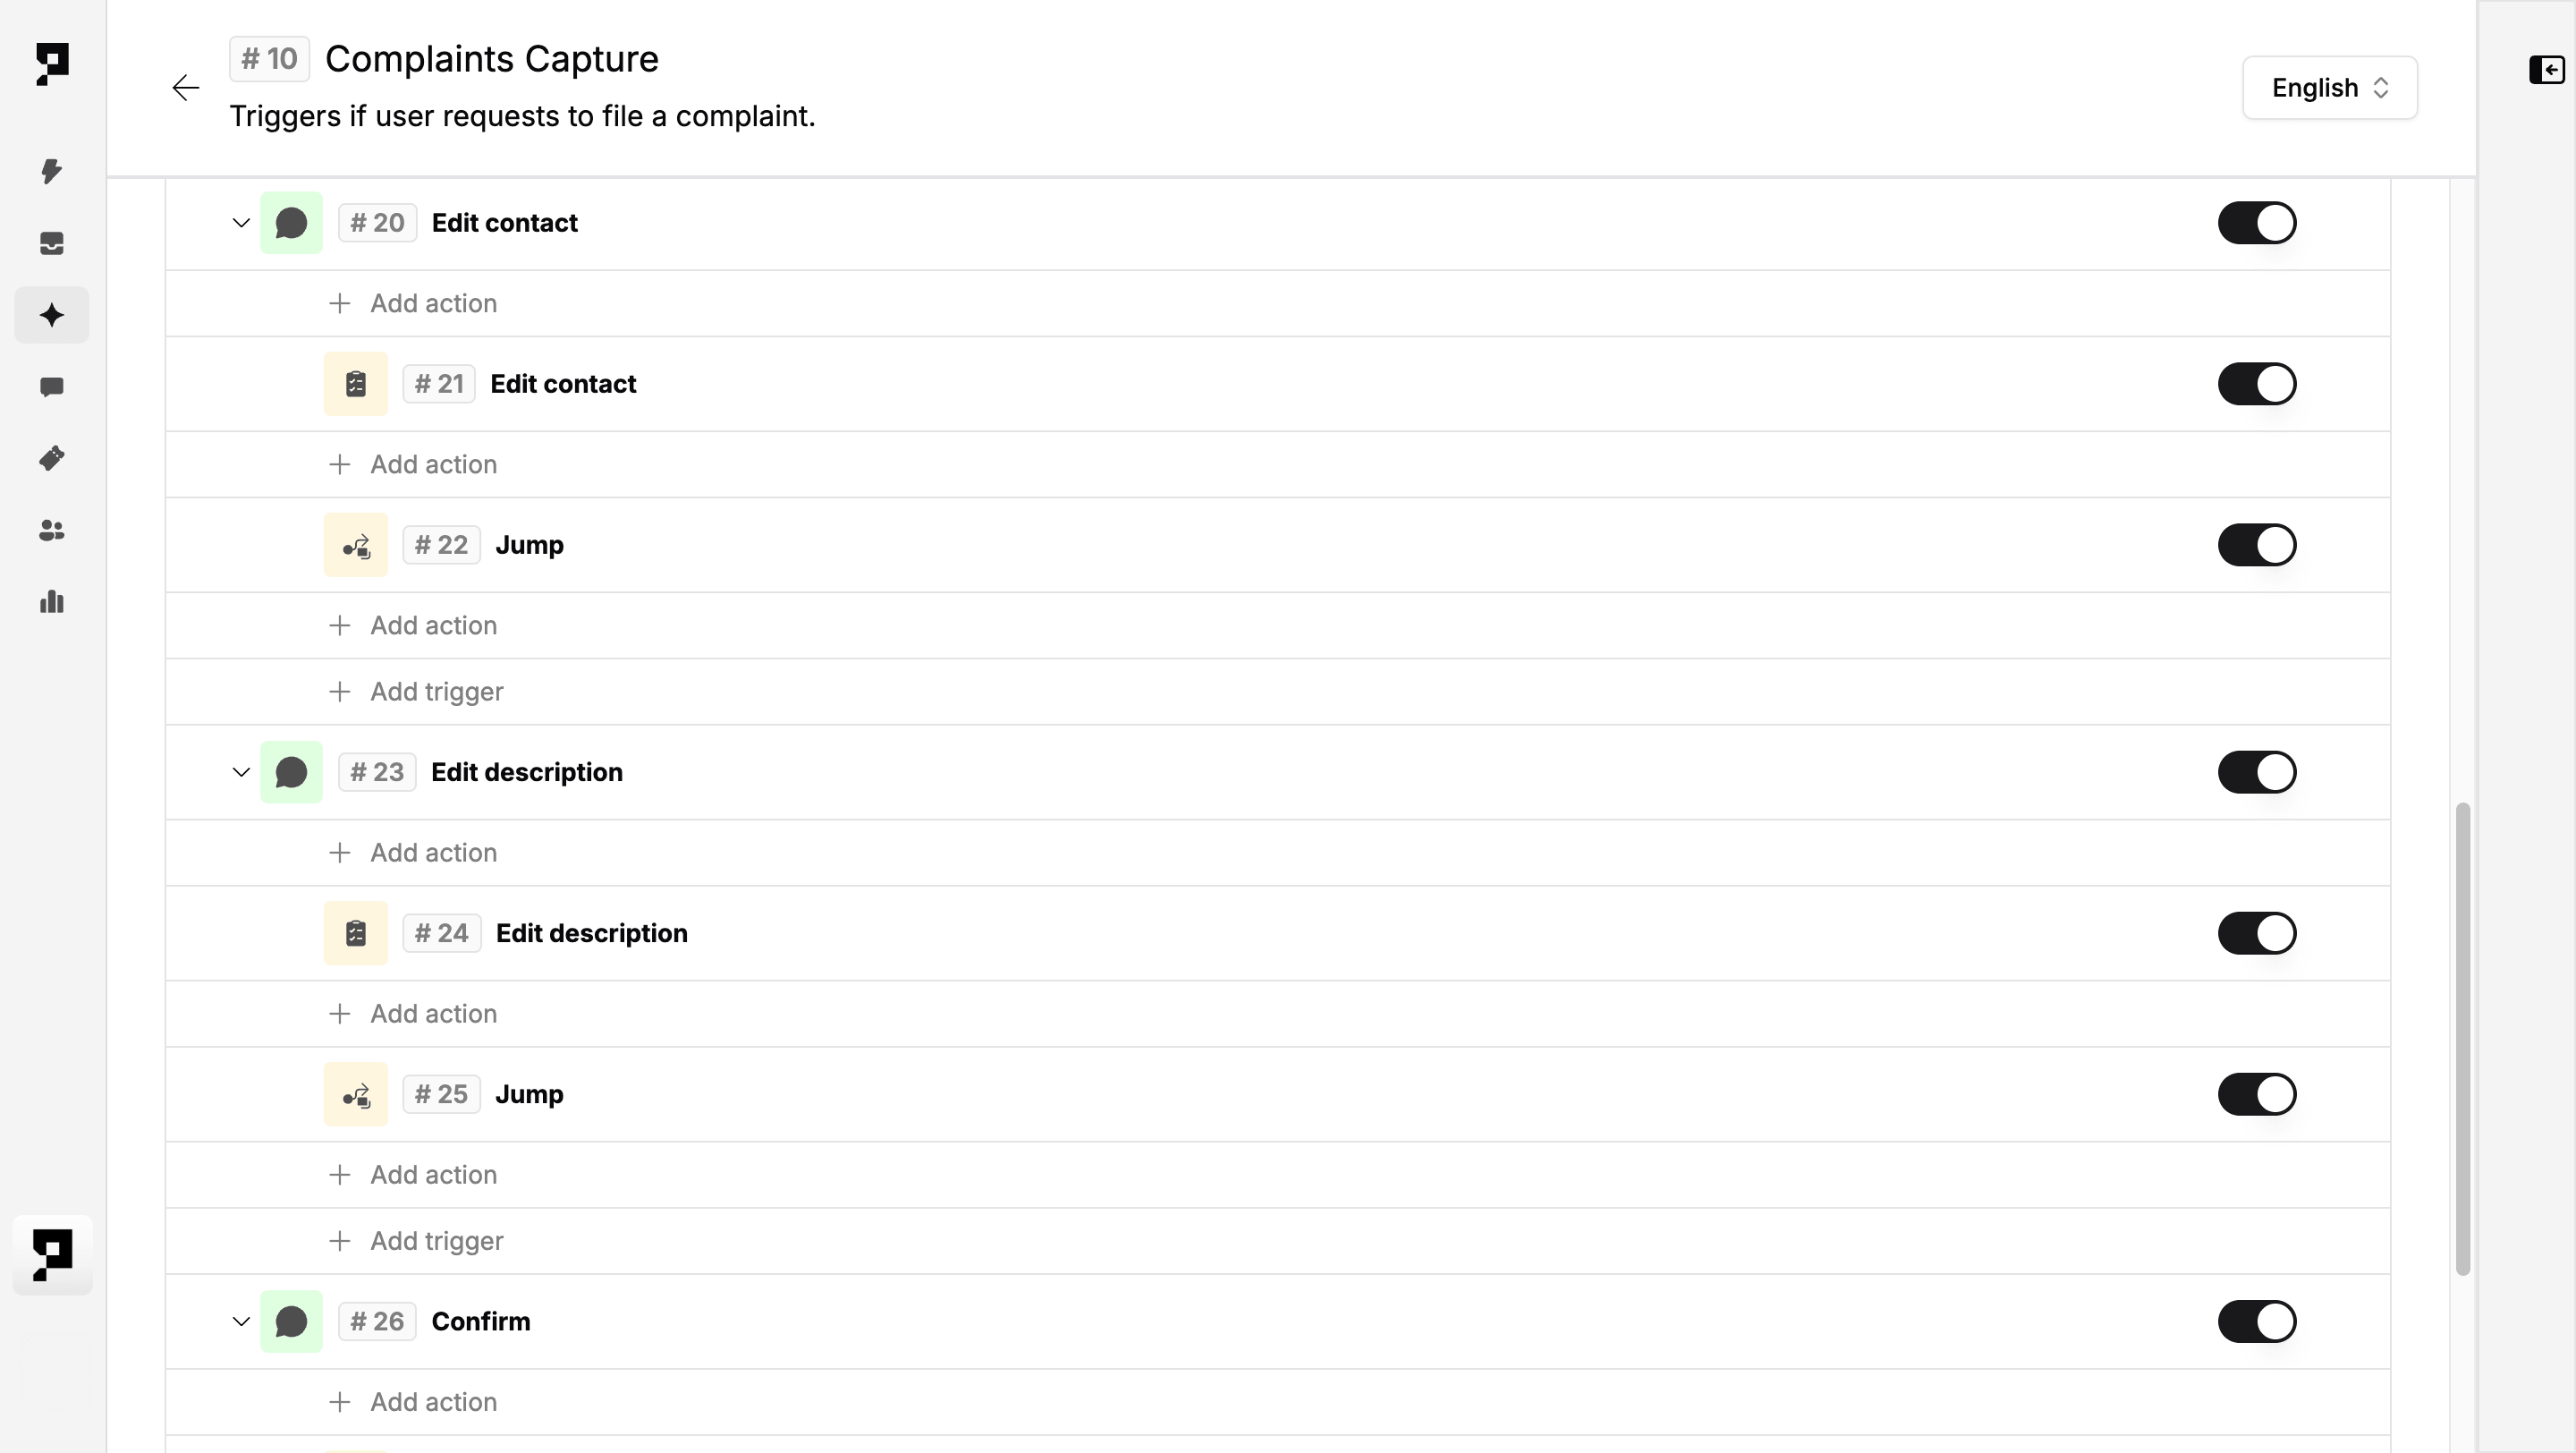
To allow edits, add a Message Received sub-trigger for each Quick Reply. Under each sub-trigger, add an Ask Survey to recapture the relevant field, then a Jump to Trigger/Action pointing back to Submission verification:
- Sub-trigger Edit name:
- Training phrases: edit name, change my name, wrong name
- Ask Survey (
first_name,last_name) - Add action: Jump to Step 6 Submission Verification
- Sub-trigger Edit contact:
- Training phrases: edit contact, wrong email, change phone
- Ask Survey (
email,phone) - Add action: Jump to Step 6 Submission Verification
- Sub-trigger Edit description:
- Training phrases: edit description, change complaint
- Ask Survey (
complaint_description) - Add action: Jump to Step 6 Submission Verification
- Sub-trigger Confirm:
- Training phrases: confirm, yes, correct, looks good
- Continues to Step 8 Create Ticket
- Sub-trigger Start Again:
- Training phrases: start again, restart, back to start, start
- Add Action: Jump to Step 3 Collect Complainant Information
7. View collected data in the Inbox
Once the survey steps are complete, the conversation appears in your team's Inbox. Select it from the conversation list to open it.
- Inbox: view full message history for your open and closed conversations as they unravel. Every survey question asked by the AI agent and every person's response can be manually reviewed here.
On the right, a side panel provides details across two tabs:
- Conversation tab: shows assignment information such as the assigned live agent, team and tags. This updates as the conversation is managed by your team.
- Person tab: shows the citizen's profile. Before a ticket is created this will show as Unknown, as survey variables are not automatically saved to the profile. Once a ticket is created in Step 8, the citizen's name, email and phone are saved to their profile and will appear here.
To view or search the full People profile at any time, navigate to the People module from the left toolbar and search by name, email, or phone number.
8. Create ticket
Generate a support ticket from the collected complaint data so your team can track, assign, and resolve the case.
Add a Create Ticket action under the Confirm sub-trigger from Step 6. All fields accept chat variables – reference them directly so the ticket is pre-populated with the person's details:
- Subject: "Complaint: {complaint_description}"
- Full name:
{first_name} {last_name} - Email:
{email} - Phone:
{phone} - Description:
{complaint_description} - Auto-apply tags: e.g. complaint
- Assignee: the team or agent responsible for complaint intake
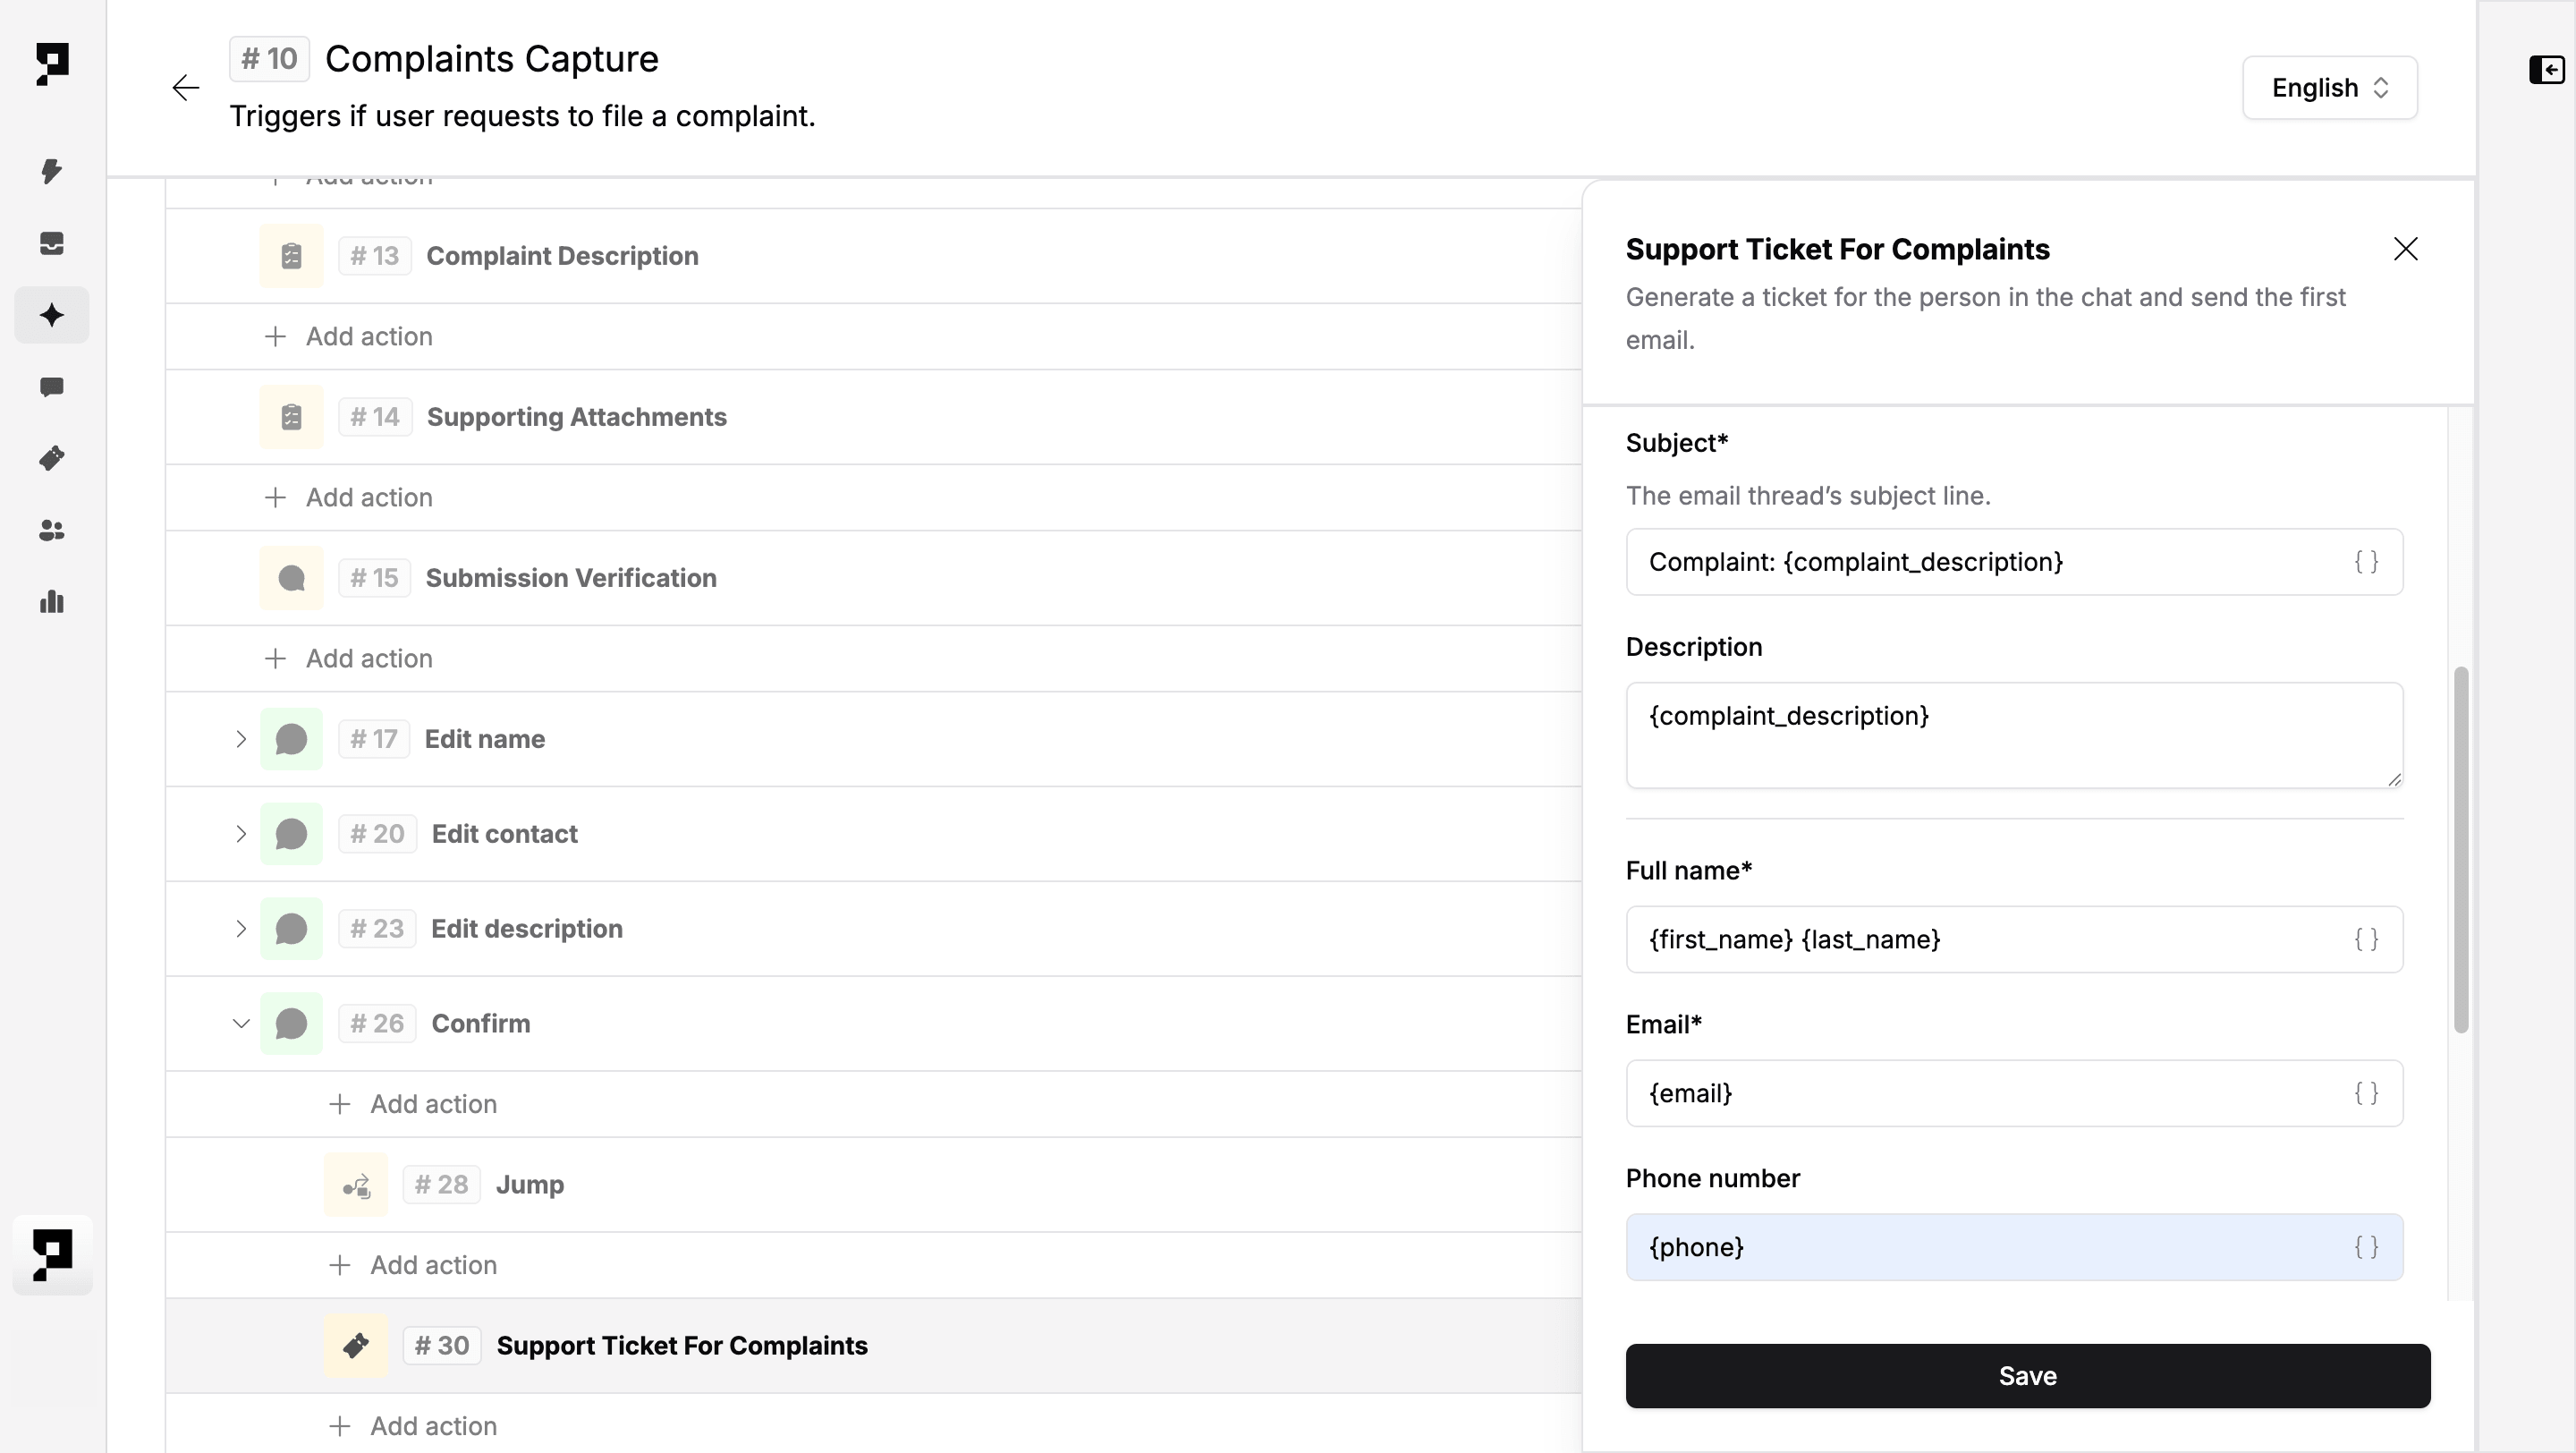
To send a confirmation email automatically, configure the Email sender and Email template fields within the Create Ticket action. The email sender must first be set up in workspace Email Domains settings. Once configured, the person receives a confirmation at the address collected in Step 3 as soon as the ticket is created.
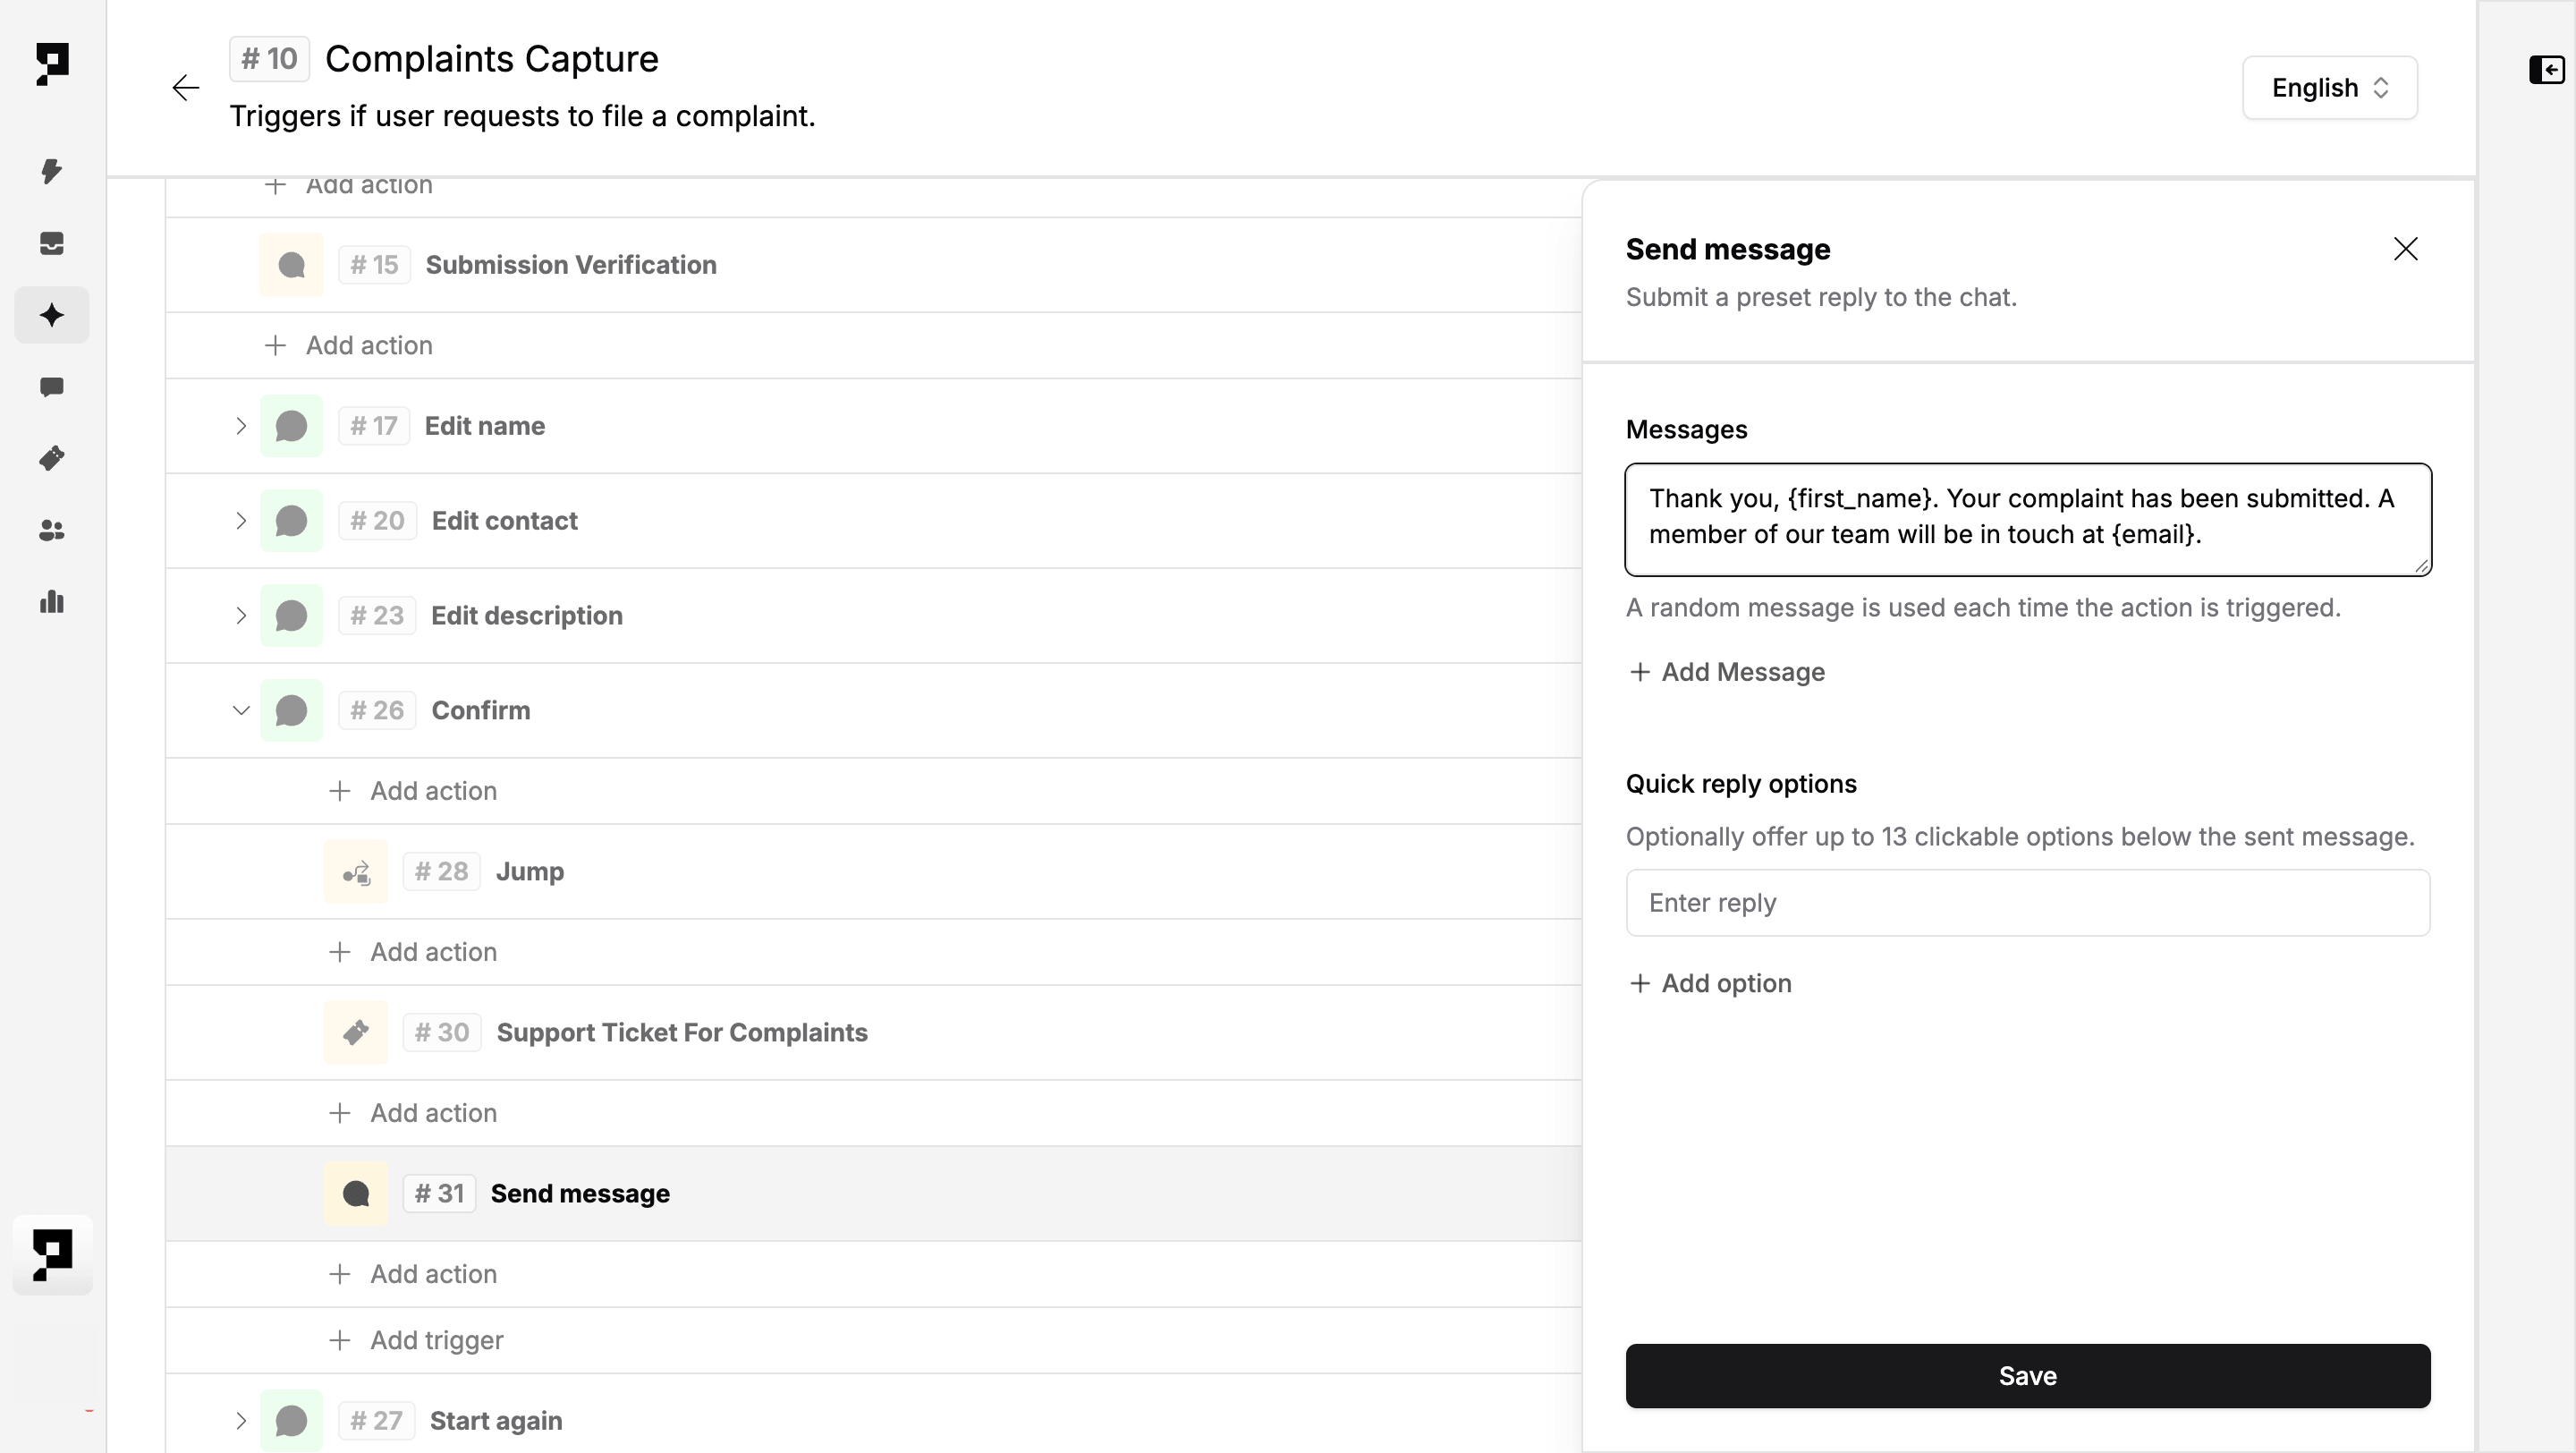
After the Create Ticket action, add a Send Message confirmation:
"Thank you, {first_name}. Your complaint has been submitted. A member of our team will be in touch at {email}."
9. Test the flow
Validate the full intake sequence before going live using the Conversation tester side panel, accessible without leaving the Action settings. Finalise the AI agent deployment by configuring your preferred channels and languages.
15‑minute live demo